Sublimation coasters are one of the easiest flat products to customize. They are small, useful, giftable, and available in several blank materials, including hardboard or MDF, ceramic, neoprene, slate, glass, and coated metal.
The process is straightforward: choose a compatible blank, size and mirror the artwork, secure the transfer, protect the heat press, and press using the blank manufacturer’s settings. The part that requires the most care is choosing the right setting for the specific coaster material. MDF, neoprene, ceramic, and slate do not all respond to the same time, temperature, or pressure.
This guide explains how to sublimate coasters from blank selection through finishing. You will learn which coaster blanks work best, how to size square and round designs, when to mirror artwork, how to tape a transfer, how to avoid ghosting, and how to troubleshoot faded prints, bare edges, cracking, and uneven color.
Quick answer: Use a sublimation-ready coaster blank with a coated white face, mirror the design, secure it with heat-resistant tape, add protective paper, and press according to the blank’s instructions. A common starting range is 385–400°F for approximately 40–90 seconds, but material-specific instructions should always take priority.
What Coasters Can You Sublimate?
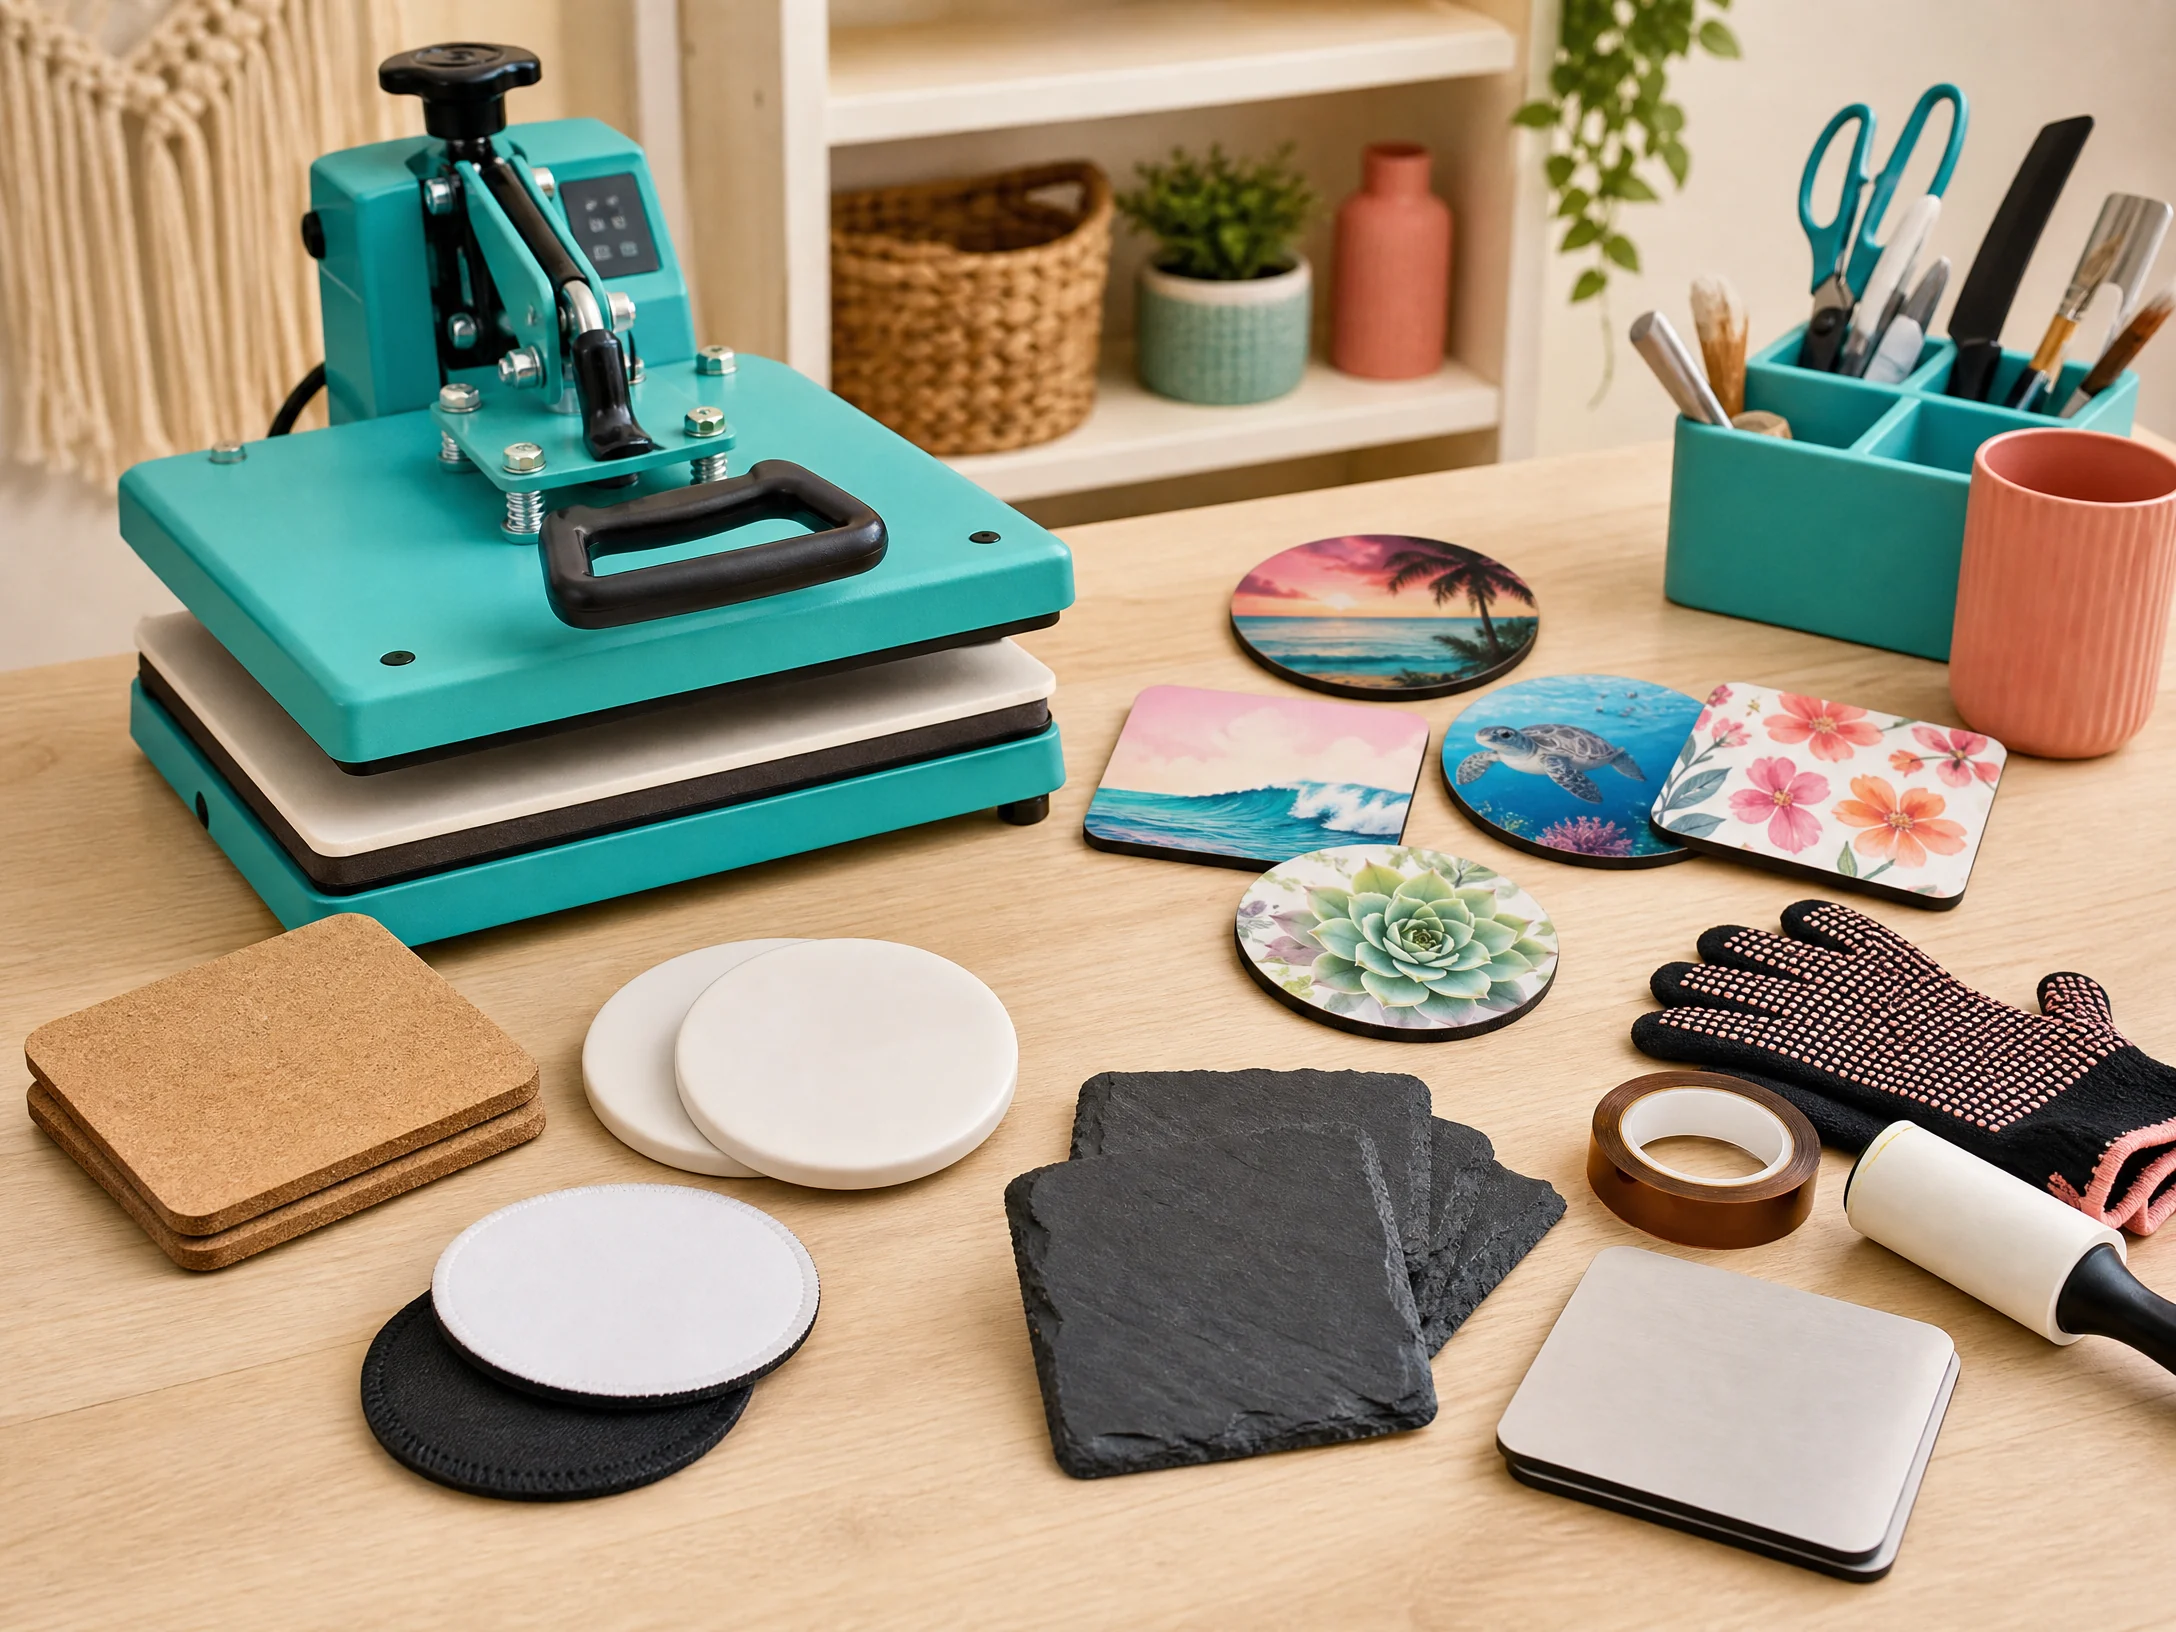
You can sublimate on a wide range of coated or polyester-based coaster blanks, including:
- Hardboard or MDF coasters with cork backing
- Ceramic sublimation coasters
- Neoprene coasters
- Slate or sandstone coasters with a sublimation coating
- Coated aluminum coasters
- Glass coasters designed for sublimation
- Polyester or fabric coaster blanks
The face of the coaster must have a sublimation-compatible surface. A plain piece of wood, uncoated ceramic, ordinary glass, or natural slate may not accept sublimation ink correctly.
Sawgrass lists MDF board, acrylic, glass, slate, ceramic, metal, and neoprene starting settings in its heat press chart, while emphasizing that the chart is only a starting point and that blank-manufacturer instructions should be followed.[1]
Best Sublimation Coaster Blanks
MDF or hardboard coasters
MDF and hardboard coasters are popular because they are lightweight, affordable, easy to package, and available with cork backing. Many have a bright white factory coating that produces vibrant designs.
They are a strong choice for:
- Personalized coaster sets
- Wedding favors
- Small-business orders
- Photo coasters
- Logo merchandise
- Holiday gifts
- High-volume production
Check whether the blank has a protective film. If it does, remove the film from the printed face before pressing.
Ceramic coasters
Ceramic coasters can have a premium feel and a glossy or smooth finished surface. Some ceramic blanks require a special coating or peel coat, and some must be pressed face-up or face-down according to the product design.
Ceramic can be more sensitive to uneven pressure and thermal shock. Allow the coaster to cool gradually and follow the supplier’s instructions carefully.
Neoprene coasters
Neoprene coasters are flexible, lightweight, and useful for promotional products, car coasters, sports designs, and branded giveaways. They generally require lighter pressure than rigid blanks.
Neoprene can absorb moisture and may need a little dish soap and warm water for stubborn stains. Avoid treating a neoprene blank like MDF or ceramic.
Slate and sandstone coasters
Slate and sandstone coasters have a natural, premium appearance. Surface variation is part of their character, so the final print may have subtle texture or color differences.
Use a sublimation-coated slate blank rather than assuming raw natural stone will transfer. Slate is heavier and can require longer pressing and careful handling.
Glass or aluminum coasters
Glass and metal coasters can produce sleek, modern products, but they often require specific coated blanks and careful protective-paper placement. Follow the exact supplier instructions for orientation, pressure, time, and cooling.
Supplies Needed for Sublimation Coasters
Gather these supplies before you begin:
- Sublimation-ready coaster blanks
- Sublimation printer and dye-sublimation ink
- Sublimation paper
- Flat heat press
- Heat-resistant tape
- Protective paper or butcher paper
- Lint roller
- Scissors or paper trimmer
- Heat-resistant gloves
- T-square, ruler, or coaster template
- Pressing pad or heat-resistant mat
- Cooling rack or clean flat surface
- Pressing pillow, if recommended for the blank
For general heat press guidance, see our Sublimation Heat Press Settings guide. Beginners can also start with our Sublimation for Beginners guide.
How to Size a Sublimation Coaster Design
The design should match the usable face of the blank, not just the package’s advertised size. Measure the actual coated surface, especially if the coaster has rounded corners, a bevel, a cutout, or a border.
Square coasters
For a 3.75-inch square coaster, create a design slightly larger than the printable face when full bleed is desired. A template around 4 inches or a supplier-provided bleed template may be appropriate, but the exact size depends on the blank.
Round coasters
For a round coaster, use the face diameter as the starting measurement. Keep important text and logos away from the edge because a round blank can trim or visually crowd the outer corners of a square artwork file.
Coasters with cutouts
Car coasters and specialty blanks may have a center hole, notch, or irregular shape. Place important artwork away from the opening and use a template that shows the actual finished shape.
Full bleed versus safe margin
Use full bleed when a pattern should reach the edges. Keep faces, names, logos, and small text inside a safe margin so they are not clipped or placed over a bevel.
Joto Imaging Supplies recommends building a template around the actual hardboard coaster size and adding bleed beyond the face for full-coverage prints.[2]
Should You Mirror a Coaster Design?
Usually, yes. Mirror the design horizontally when the transfer is placed printed-side-down against the coaster.
Mirroring is especially important for:
- Names
- Monograms
- Dates
- Quotes
- Logos
- Directional illustrations
- Pet portraits with text
Before printing a full sheet, print a small test with a word or arrow so you can confirm the orientation.
How to Sublimate Coasters Step by Step
1. Choose the correct blank
Select a coaster specifically labeled for sublimation. Confirm the material, coated face, shape, dimensions, backing, protective film, and manufacturer’s settings.
Do not press an ordinary ceramic tile, raw slate, or unfinished wood coaster using a sublimation recipe unless the product has a compatible coating.
2. Inspect and clean the face
Check the blank for dust, coating defects, scratches, and loose fibers. Use a lint roller or clean, dry cloth to remove debris.
If the blank has a protective film, remove it from the printable face. Do not remove a backing or coating that the supplier says should remain in place.
3. Prepare the artwork
Create the design at the measured size, add bleed if needed, and keep important elements inside the safe zone. Use a coaster template whenever possible.
For sets, keep the artwork consistent in size and placement. Four coasters that are supposed to match should have the same border, scale, and orientation.
4. Mirror and print
Mirror the artwork before printing. Print on the coated side of sublimation paper using the correct printer profile and ink.
The design may look pale on paper. This is normal; sublimation colors become vivid after heating.
5. Trim the transfer
Trim close enough to reduce excess paper, but leave a useful margin for taping. For a full-bleed coaster, do not cut away so much paper that the transfer becomes difficult to align.
6. Position the transfer
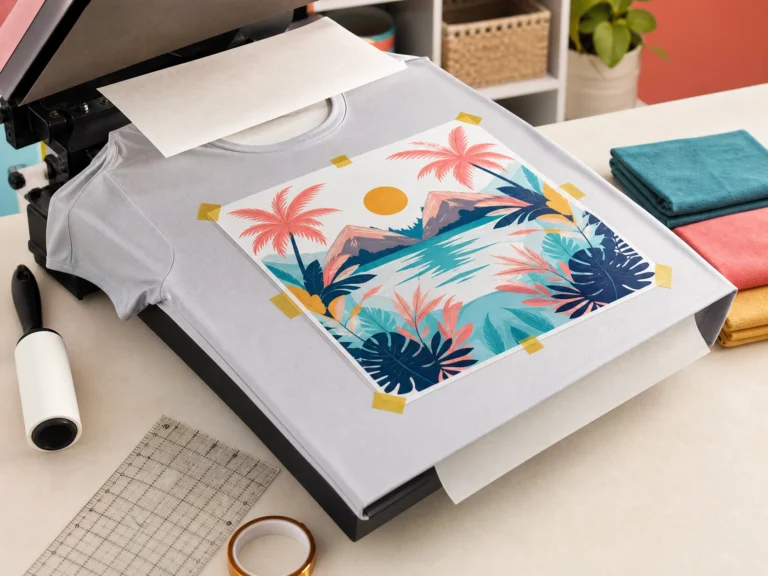
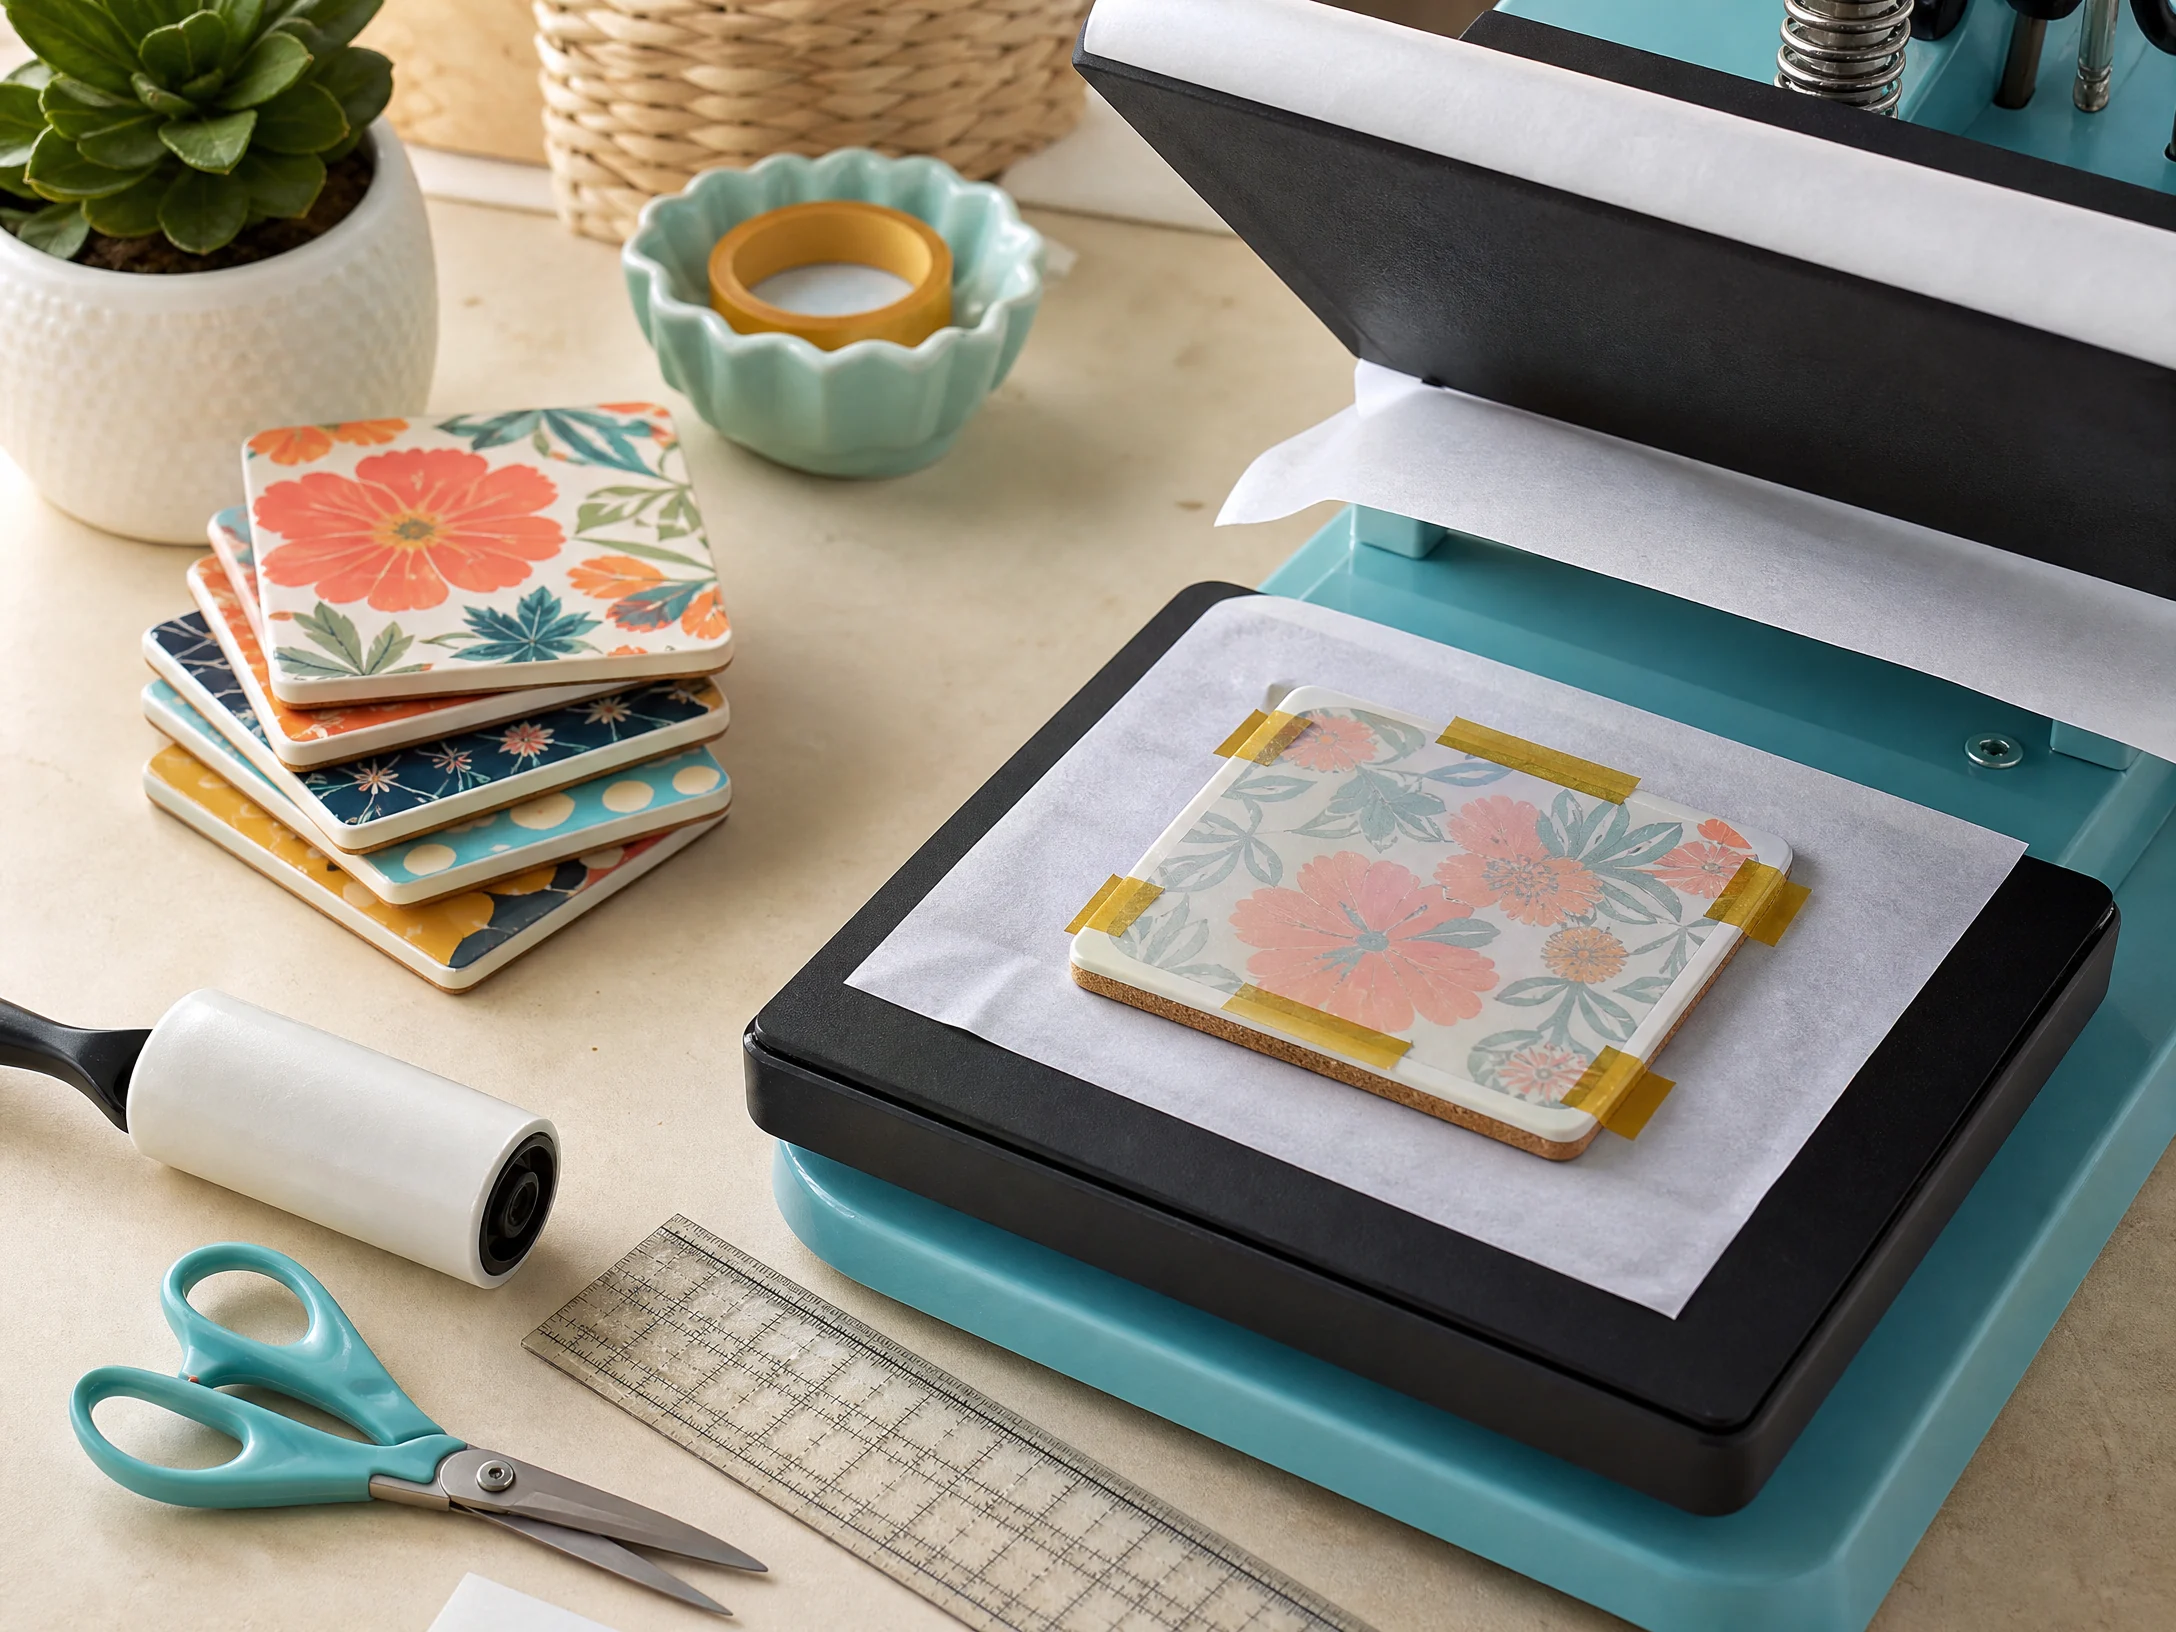
Place the transfer printed-side-down on the coated face. Align the edges, center the artwork, and check that important details are not over a cutout or bevel.
7. Secure with heat-resistant tape
Use small strips of heat-resistant tape to stop the transfer from shifting. Tape the paper to the coaster edge or backing when that method is recommended.
Keep tape off the printable face. Tape beneath the face can block the transfer and leave a pale line or ghosted area.
8. Protect the press
Place clean protective paper below and above the coaster. The paper prevents ink from contaminating the platen and pressing pad.
For cork-backed blanks, protect the cork from direct contact with the hot platen if the supplier recommends a protective layer.
9. Press the coaster
Place the taped coaster on the press according to the manufacturer’s orientation. Set the correct temperature, time, and pressure for the blank.
Do not assume that every coaster should be pressed face-up. Some ceramic coasters and specialty blanks require a different orientation.
10. Open the press carefully
When the timer finishes, lift the press straight up instead of sliding it. Sliding can move the paper while the dye is still active and create a blurry duplicate image.
Use heat-resistant gloves for hot rigid blanks and move the coaster assembly to a clean, flat cooling surface.
11. Cool and peel
Allow the coaster to cool according to the blank’s instructions. Remove the protective paper, tape, and transfer with care.
Peel smoothly rather than stopping halfway across the image. Let ceramic and coated rigid blanks cool gradually to reduce the risk of thermal shock or edge damage.
12. Inspect and finish
Check the coaster for:
- Even color
- Complete coverage
- Sharp edges
- Correct orientation
- No ghosting
- No tape lines
- No bare spots
- No coating cracks
- Clean cork or backing
Do not stack hot coasters. Warm coatings can be vulnerable to edge chips, scratches, or sticking.
Sublimation Coaster Time and Temperature Settings
The correct setting depends on the blank, coating, press, paper, pressure, and manufacturer. Use the table below only as a testing framework.
| Coaster type | Starting temperature | Starting time | Pressure | Notes |
|---|---|---|---|---|
| MDF or hardboard | 385–400°F / 196–204°C | 50–90 seconds | Medium | Test the coating and thickness |
| Neoprene | 365–400°F / 185–204°C | 40–45 seconds | Light | Avoid crushing or stretching the material |
| Ceramic | Around 400°F / 204°C | 60–240 seconds | Light to medium | Orientation and coating vary widely |
| Slate or sandstone | Around 400°F / 204°C | 60–90 seconds | Medium | Natural surface variation is expected |
| Coated aluminum or metal | Around 400°F / 204°C | About 60 seconds | Medium | Follow the metal blank instructions |
| Glass | Around 400°F / 204°C | Product-specific, often longer | Medium | Use only sublimation-coated glass |
Sawgrass lists MDF board at 400°F for 60 seconds, acrylic at 375°F for 60 seconds, metal at 400°F for 60 seconds, glass at 400°F for 420 seconds, and slate at 400°F for 420 seconds in its general chart.[1] The chart is a starting point, not a replacement for the blank maker’s instructions.
Jennifer Maker demonstrates different coaster materials with different starting recipes, including MDF at 390°F for 50 seconds, neoprene at 385°F for 40 seconds, square coasters at 400°F for 60 seconds, and ceramic coasters at 400°F for a longer cycle.[3]
For more general substrate references, see our Sublimation Temperature Chart.
How to Sublimate MDF Coasters
MDF and hardboard coasters are often the easiest place to begin.
- Remove protective film if present.
- Lint-roll the coated face.
- Preheat briefly if the supplier recommends it.
- Place the transfer face down.
- Tape the edges without covering the face.
- Add protective paper above and below.
- Press at the blank maker’s setting.
- Lift the press straight up.
- Cool before peeling and stacking.
A cork backing usually remains attached during pressing, but the product instructions should determine whether additional protection or a specific orientation is required.
How to Sublimate Neoprene Coasters
Neoprene is flexible, so use lighter pressure than you would for a rigid hardboard coaster. Smooth the blank before pressing and avoid creating folds.
Neoprene can sometimes hold moisture or absorb a spill. Let it cool completely before washing or handling, and provide care guidance appropriate to the blank.
How to Sublimate Ceramic Coasters
Ceramic coasters require extra attention because blank construction varies. Some are coated on one side, some have a rounded edge, and some require pressing face-down.
Before pressing:
- Confirm which side is printable.
- Check whether a protective coating or film must be removed.
- Use a compatible pressing pad.
- Confirm the required orientation.
- Use light or medium pressure as instructed.
- Allow the coaster to cool gradually.
Do not use a ceramic mug setting automatically. A coaster’s coating, thickness, shape, and pressing orientation may be different.
How to Sublimate Slate Coasters
Use sublimation-coated slate or sandstone blanks. Natural slate can have uneven edges, texture, and color variation, so the print will not look exactly like a perfectly smooth white hardboard coaster.
Slate coasters are heavier and may require careful loading and cooling. Use a protective sheet and keep the press area clean because ink can migrate around the edges of a full-bleed design.
How to Sublimate Car Coasters
Car coasters are often round or shaped with a center cutout. Measure the printable face and create the artwork around the opening.
Keep text and logos away from the cutout. Use a shape template, mirror the transfer, and tape it carefully so the paper does not shift into the opening during pressing.
Common Sublimation Coaster Problems
Why is my coaster faded?
Possible causes include insufficient heat or time, low pressure, an incompatible blank, moisture, an uneven press, or a coating that is not designed for sublimation.
Start with the blank maker’s instructions. If the same transfer is bright on one blank and faded on another, the blank coating or setting is likely the issue.
Why is there a blurry outline around the design?
The transfer moved during pressing. Use heat-resistant tape, keep the paper flat, and lift the press straight up when the cycle ends.
Why is there a pale line where the tape was?
The tape crossed under the printable face or covered part of the transfer. Keep tape at the edge and use only the amount required to hold the paper securely.
Why are the coaster edges blank?
The transfer may be too small, the design may lack bleed, or the coaster may have a bevel that is outside the usable print area. Measure the coated face and use a correct template.
Why did my MDF coaster crack or chip?
Excessive pressure, excessive heat, a damaged coating, or handling the blank while it is hot can cause edge damage. Follow the manufacturer’s setting and cool the coaster on a flat surface.
Why does the design look uneven?
The blank may not be flat, the press may have uneven temperature or pressure, or the transfer may not contact the coating fully. Test the press with a temperature strip or manufacturer-approved method if unevenness continues.
Why did the cork backing lift?
The blank may have been overheated, the tape was removed while hot, or the product requires a different protection method. Allow the coaster to cool before handling and follow the blank instructions.
Why is the color different from my screen?
Sublimation colors depend on the printer profile, ink, paper, heat press, coating, and the color of the blank surface. A white-coated coaster generally produces the most predictable result.
How to Make a Coaster Set
A coordinated set is a strong product for gifts and small businesses.
- Choose a single blank style and size.
- Create a template with consistent bleed and safe margins.
- Make four or six matching designs.
- Use the same printer profile and paper.
- Mark the press orientation.
- Test one coaster before the full batch.
- Press the set using the same settings.
- Cool all pieces before stacking.
- Inspect the edges and backing.
- Package with care instructions.
You can create sets around weddings, holidays, sports teams, family names, pets, coffee shops, local businesses, or seasonal patterns.
Coaster Care Instructions
Care depends on the blank material. In general:
- Wipe hardboard, ceramic, slate, and coated metal with a damp cloth.
- Do not soak cork-backed blanks unless the manufacturer says it is safe.
- Use mild dish soap for stubborn neoprene stains.
- Avoid abrasive cleaners on coated faces.
- Do not put a coaster in a dishwasher unless the blank maker explicitly approves it.
- Keep natural slate away from hard impacts and sudden temperature changes.
Include the blank’s actual care instructions with customer orders rather than promising that every coaster is dishwasher-safe.
Selling Sublimation Coasters
Coasters are useful for bundles, event favors, and personalized gift products. When setting a price, include:
- Coaster blank
- Sublimation paper and ink
- Design time
- Test pieces
- Pressing time
- Protective paper and tape
- Packaging
- Cork backing or other finishing parts
- Failed or damaged blanks
A simple four-piece MDF set may be efficient to produce, while ceramic and slate products may need more handling and packaging protection. Photograph the finished product clearly so customers can see the surface finish, shape, and backing.
For broader business planning, see our How to Start a Sublimation Business guide.
Frequently Asked Questions
Can you sublimate on any coaster?
No. The coaster must have a sublimation-compatible coating or polyester surface. Plain wood, untreated ceramic, ordinary glass, and raw slate may not accept sublimation properly.
What is the best coaster blank for beginners?
White-coated MDF or hardboard coasters with cork backing are often beginner-friendly, affordable, and easy to press. Follow the exact blank instructions.
Do you mirror sublimation coaster designs?
Usually, yes. Mirror the artwork before printing when the transfer is placed face down on the coated coaster face.
What temperature do you use for sublimation coasters?
Many coaster blanks use approximately 385–400°F, but the time varies widely by material. MDF may be around 50–90 seconds, neoprene around 40–45 seconds, and ceramic or slate may require longer cycles. Use the blank maker’s instructions first.
How big should a coaster sublimation design be?
Size the design to the actual printable face and add bleed for full coverage. Common coasters range from about 2.5 to 4 inches, but measure your specific blank.
Why did my coaster design move?
The transfer was not secured, the press was slid during opening, or the blank shifted. Use heat-resistant tape and lift the platen straight up.
Can you sublimate on cork coasters?
You can sublimate on a cork-backed coaster when the top face has a sublimation-ready coating. The cork backing itself is not usually the printable surface.
Can sublimation coasters get wet?
Many finished coasters are designed to handle normal drink condensation, but care varies by material. Wipe them clean and follow the blank manufacturer’s instructions.
Final Sublimation Coaster Checklist
Before pressing, confirm that:
- The blank is made for sublimation.
- The printable face is clean and free of protective film when required.
- The design matches the actual coaster size.
- Full-bleed artwork has enough bleed.
- Important details are inside the safe area.
- The design is mirrored.
- The transfer is taped without covering the printable face.
- Protective paper is above and below the blank.
- The press settings match the coaster material.
- You tested one blank before a full set.
- The press will lift straight up.
- The coaster will cool before peeling, stacking, or packaging.
Sublimation coasters are a practical product for beginners and experienced makers. Start with a compatible white-coated blank, measure carefully, test the settings, and treat MDF, ceramic, neoprene, slate, glass, and metal as separate materials. With that workflow, you can create bright coaster sets that look professional and are ready for gifts, events, and small-business orders.