The right sublimation heat press settings depend on the blank, coating, press, transfer paper, and manufacturer’s instructions. Use this guide as a practical starting point, then test the exact product before making a batch.
If you have ever opened your heat press and wondered why one tumbler looks vibrant while the next one looks faded, you are not alone. Sublimation is wonderfully consistent once the variables are controlled, but it is not a one-setting-fits-everything process. A polyester shirt, ceramic mug, stainless-steel tumbler, neoprene mouse pad, and faux-leather patch can all require different combinations of temperature, time, pressure, preparation, and cooling.
This guide brings those decisions into one place. You will find a practical sublimation heat press chart, explanations of temperature, time, and pressure, starting points for common blanks, a sublimation heat press settings chart for quick reference, and troubleshooting advice for faded colors, ghosting, bubbles, scorching, uneven transfers, and warped products.
If you are completely new to the craft, start with SublimationCo’s Sublimation for Beginners: Complete Step-by-Step Guide. If you are already pressing projects and want a reliable reference beside your machine, bookmark this page as your heat press cheat sheet sublimation guide.
Quick answer: what are the best sublimation heat press settings?
For many white polyester projects, a practical starting point is 385°F to 400°F for 45–60 seconds with medium pressure. However, that is only a starting range. Ceramic mugs often need substantially longer dwell times, tumblers may require a dedicated tumbler press or a rotation cycle, and specialty blanks such as slate, glass, acrylic, faux leather, and mouse pads follow product-specific instructions.
Sawgrass publishes a useful starting chart that lists 400°F for 45 seconds on polyester fabric, 400°F for 45 seconds on neoprene, 400°F for 60 seconds on metal, and a much longer range for ceramic mugs, while emphasizing that the blank manufacturer’s recommendations, a calibrated press, testing, and practice still matter.
The safest workflow is simple: confirm that the blank is sublimation-ready, record its recommended settings, prepare the surface, press one test piece, inspect the result after cooling, and change only one variable at a time.
Sublimation heat press chart: settings by blank
The following sublimation heat press settings chart is designed as a reference for common products. It is not a universal guarantee. Coatings vary between suppliers, heat presses display temperatures differently, and a thick blank may behave differently from a thin one even when both are labeled with the same material.
| Blank or substrate | Starting temperature | Starting time | Pressure | Typical peel or handling | Important notes |
| White 100% polyester shirt | 385–400°F / 196–204°C | 45–60 sec | Medium | Quick peel unless the blank says otherwise | Pre-press to remove moisture and wrinkles. |
| Polyester hoodie | 385°F / 196°C | 60 sec | Medium | Quick peel | Use protective paper inside and above the garment. |
| Polyester tote bag | 385–400°F / 196–204°C | 55–70 sec | Medium | Quick peel | Place protective paper inside the bag. |
| Polyester socks | 360–385°F / 182–196°C | 45–60 sec per side | Medium | Cool briefly, then peel | Press one side at a time unless the supplier says to rotate. |
| Neoprene mouse pad | 385–400°F / 196–204°C | 45–60 sec | Medium | Follow the blank guide | Pre-press carefully and keep the transfer flat. |
| Ceramic sublimation mug | 350–400°F / 177–204°C | 150–300 sec | Medium to firm | Product-specific | Mug presses vary; follow the mug supplier’s chart. |
| Stainless-steel tumbler | 350–400°F / 177–204°C | 60–90 sec per section | Medium to firm | Product-specific | Full wraps may need rotation or an oven method. |
| Aluminum water bottle | 365–400°F / 185–204°C | 90–120 sec | Medium | Follow blank guide | Cylindrical shape and coating thickness affect time. |
| Aluminum photo panel | 400°F / 204°C | 60–90 sec | Medium | Cool before handling | Press face down when instructed. |
| MDF or hardboard coaster | 385–400°F / 196–204°C | 45–60 sec | Medium | Quick peel | Keep the board flat while cooling. |
| Ceramic tile | 385–400°F / 196–204°C | 6–8 min | Light to medium | Cool carefully | Thick ceramic holds heat; use the supplier’s instructions. |
| Glass sublimation blank | 400°F / 204°C | Around 180 sec | Medium | Product-specific | Use a blank designed and tested for sublimation. |
| Slate photo blank | Around 400°F / 204°C | 5–7 min | Medium | Cool on a flat surface | Natural variation in slate can affect the finish. |
| Sublimation-ready faux leather | 350–385°F / 177–196°C | 40–60 sec | Light to medium | Follow blank guide | Never assume untreated leather is sublimation-compatible. |
| Sublimation HTV | Around 310°F / 154°C | Around 15 sec | Medium | Product-specific | This is a different process from direct polyester sublimation. |
| Acrylic sublimation blank | Around 375°F / 190°C | Around 60 sec | Medium | Follow blank guide | Confirm the acrylic is specifically made for sublimation. |
These ranges combine manufacturer-style starting points from Sawgrass, HeatPressNation, Joto Imaging Supplies, and HTVRONT. Their charts do not match perfectly because products, presses, coatings, and application methods vary. That is exactly why a chart should guide your first test rather than replace the blank manufacturer’s instructions.
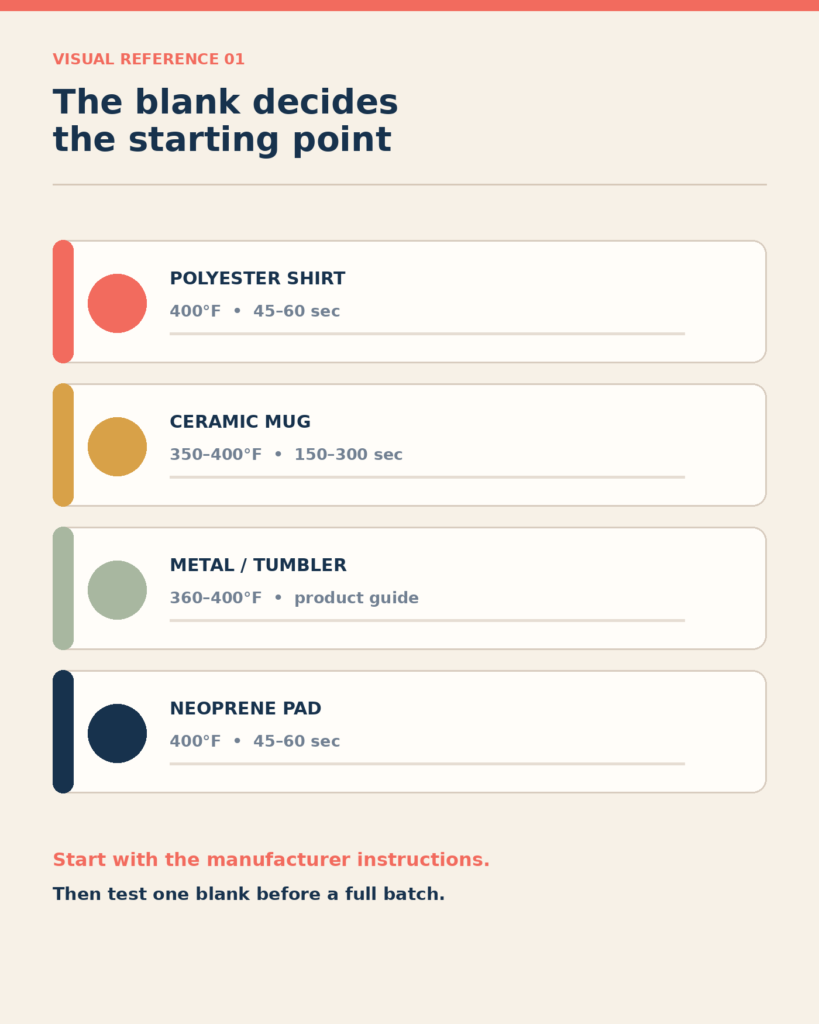
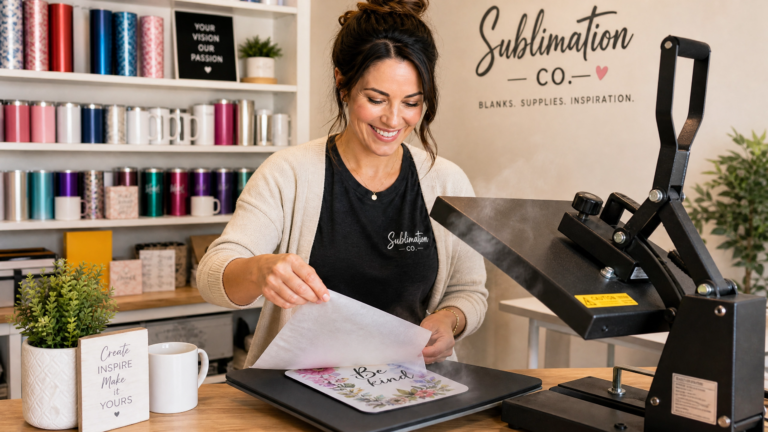
Illustration: Use the substrate as your first decision point. The “right” setting for a shirt is not automatically right for a mug or tumbler.
Understanding the three parts of sublimation heat press settings
When crafters search for heat press sublimation advice, they are usually trying to balance three variables: temperature, time, and pressure. A fourth factor—surface preparation—often determines whether the chart works at all.
Temperature
Temperature controls how much heat energy reaches the transfer and blank. Sublimation ink needs enough heat to convert and bond with polyester fibers or a suitable polymer coating. If the temperature is too low, the transfer may look pale, weak, or incomplete. If it is too high, the blank may scorch, warp, yellow, flatten, or develop unwanted press marks.
The number on the display is not always the temperature at the exact center of the platen. A press that reads 400°F may have hot and cool zones. If results vary from the left side to the right side, test the platen with an appropriate heat-temperature tool or have it checked by a qualified technician.
Time
Time determines how long the blank receives the combination of heat and pressure. A thin polyester shirt may need less than a minute. A ceramic tile or mug has more mass and may need several minutes to heat through. Increasing time is not always the answer to a faded result. If the blank is incompatible, the paper moved, the pressure is uneven, or the transfer is damp, a longer press can make the problem worse.
Pressure
Pressure keeps the transfer in close contact with the coated surface and helps the blank receive even heat. Too little pressure can cause pale areas or incomplete transfers. Too much pressure can flatten neoprene, leave unwanted platen marks, distort a soft blank, or create a warped result as the item cools.
For most common products, medium pressure is a useful starting point. Specialty blanks should be tested with the manufacturer’s recommended pressure, especially when they are soft, curved, thin, or heat-sensitive.
Preparation
Preparation includes lint rolling, removing dust, drying the blank, pre-pressing when appropriate, mirroring the artwork, protecting the press, and securing the transfer. Many failures blamed on temperature are actually caused by moisture, movement, lint, coating damage, or incorrect placement.
Sublimation heat press temperature guide for shirts
A white 100% polyester shirt is usually the easiest first project because polyester accepts sublimation ink and the garment is flexible enough to distribute pressure. A practical starting point is 385°F for 45–60 seconds with medium pressure. Some workflows use 400°F for around 45 seconds. Both can work when the shirt, paper, ink, press, and instructions are compatible.
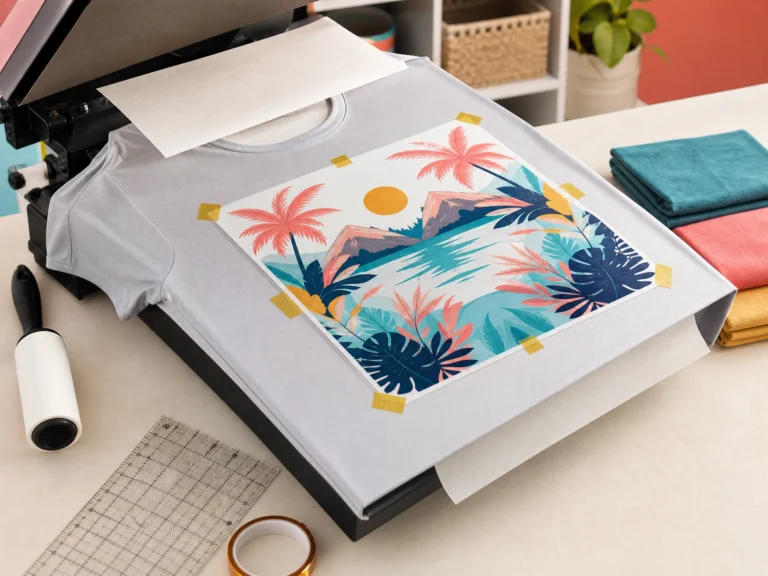
Before pressing, lint roll the garment thoroughly. A tiny fiber can become a permanent colored speck after pressing. Place a clean sheet of butcher paper inside the shirt to stop ink from transferring through to the back. Pre-press for a few seconds to remove wrinkles and moisture, but avoid over-pressing delicate fabrics.
The phrase sublimation heat press chart shirt usually refers to this basic polyester workflow, but shirt blends need more care. A 65% polyester shirt may produce a softer or more vintage result than a 100% polyester shirt. Cotton does not provide the same polymer surface required for standard sublimation. SublimationCo’s guide on Sublimation on Cotton: Spray Coating vs. Clear HTV explains why cotton needs a compatible polymer workaround rather than simply more time and heat.
After the press opens, remove the paper in a quick, controlled motion if the blank instructions recommend a quick peel. Do not drag the hot transfer across the fabric. That is one of the easiest ways to create ghosting.
Heat press temperature guide: sublimation tumbler settings
Tumblers are popular because they create high-perceived-value products, but they are also one of the most common sources of inconsistent results. A heat press temperature guide sublimation tumbler users can trust must begin with the exact blank and press type.
Many stainless-steel tumbler workflows begin somewhere between 350°F and 400°F for 60–90 seconds per section with medium to firm pressure. Some full-wrap tumblers need to be rotated and pressed again. Others are designed for a convection oven with shrink film. A tumbler press and an oven do not transfer heat in exactly the same way, so never copy a setting from one method without testing it.
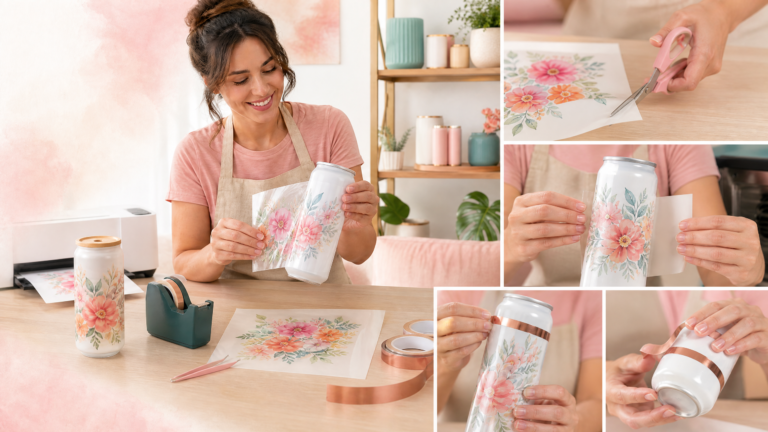
Measure the tumbler rather than relying on a generic template. A small gap at the seam, a design that overlaps too far, or an incorrectly sized wrap can create a visible line. Tape the leading edge, the seam, and the trailing edge securely. Use clean protective paper around the transfer and remove air pockets before pressing.
For a detailed product workflow, see SublimationCo’s 20oz Tumbler Sublimation: The Ultimate Guide for Crafters & Small Businesses. The guide covers wrap sizing, supplies, application, design files, and business considerations. If you are seeing blurry edges, read How to prevent ghosting in sublimation tumblers as a related troubleshooting reference while you test your process.
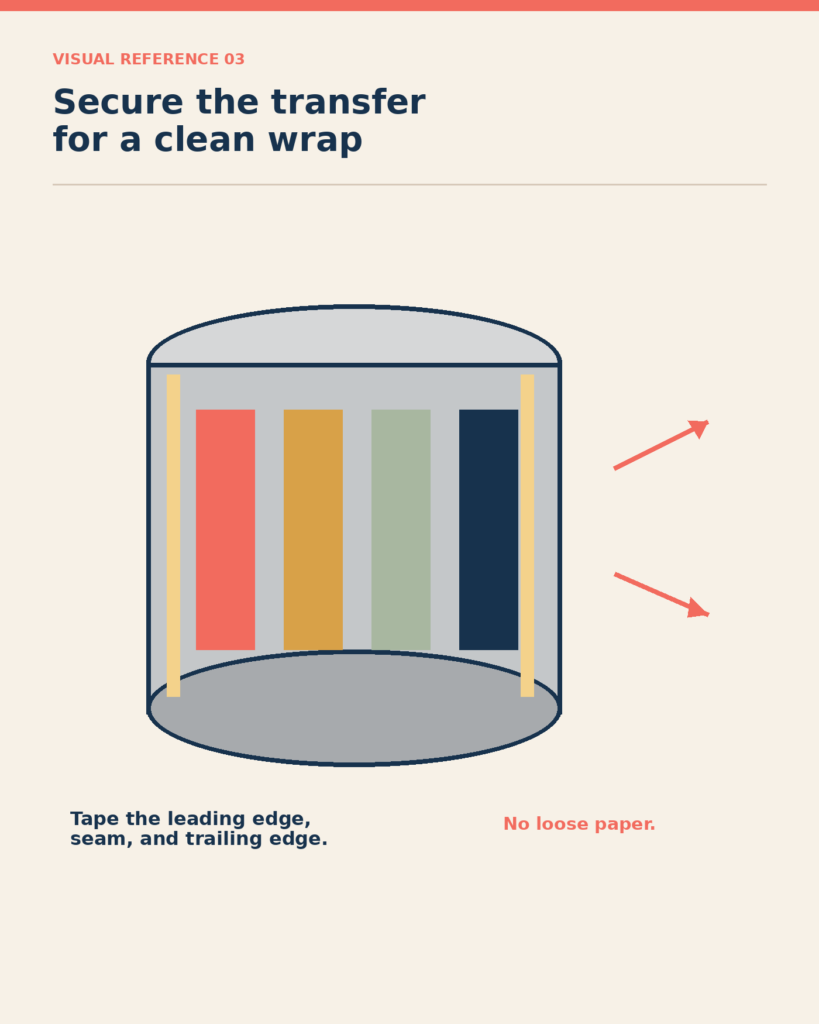
Illustration: A tightly secured transfer helps prevent movement while the ink is in its gaseous state.
Ceramic mug settings: why time is longer
Ceramic mugs have a dense body and a coated surface that takes longer to heat than a thin shirt. That is why a mug setting often uses a longer dwell time even when the temperature is lower than a shirt setting. Sawgrass lists ceramic mug ranges of 350–400°F and 150–300 seconds, while HeatPressNation lists a coffee mug starting point of 385°F for about 190 seconds.
Use a mug press whenever possible because its heating element is designed to wrap around the mug. Center the design between the handle and the opposite edge, and keep important text away from the curved ends. If you see a pale strip, the mug may not be centered in the element or the pressure may not be even.
Do not assume that every ceramic mug can be sublimated. The mug needs a compatible polyester coating. A household mug may look smooth and white but still reject the ink.
Mouse pads and neoprene blanks
Neoprene mouse pads often start around 385–400°F for 45–60 seconds with medium pressure. The exact recommendation depends on the thickness, face coating, rubber backing, and press. If a mouse pad bubbles, it may contain moisture or air, or the coating may not be intended for sublimation.
Pre-pressing is especially important for soft blanks. Keep the pad flat and use a clean piece of protective paper. Place the transfer carefully, secure it with heat-resistant tape, and open the press smoothly. If the paper lifts or shifts, you may see a duplicate edge or shadow around the artwork.
For the complete project workflow, link to SublimationCo’s Sublimation Mouse Pad Tutorial, then connect to the specific mouse pad temp and time guide. This creates a useful internal cluster around mouse pad blanks, design sizing, time, temperature, and troubleshooting.
Sublimation heat press machine buying considerations
A sublimation heat press machine is only as useful as its consistency. Beginners often focus on the maximum temperature, but a press also needs even heating, stable pressure, suitable platen size, reliable controls, and enough room for the products you plan to make.
A 15×15-inch or 16×20-inch flat press can handle many shirts, mouse pads, tote bags, panels, and flat blanks. A mug press is more appropriate for coated mugs. A tumbler press or dedicated oven is better for curved drinkware. If you plan to sell several product types, buying a single machine that is technically capable of everything may produce less consistent results than using the correct tool for each substrate.
A clamshell press takes less workspace, while a swing-away press can make it easier to position thicker or more delicate blanks. Choose the format that allows you to work safely and position transfers without touching the hot platen.
Heat pressing sublimation: a repeatable workflow
The following process is more valuable than memorizing one number because it works across many blanks.
1. Confirm the substrate
Read the product listing, packaging, insert card, or manufacturer’s instruction sheet. Look for the exact temperature, time, pressure, direction, rotation, peel, and cooling guidance.
2. Prepare the artwork
Measure the printable area, size the file accurately, mirror the design, and keep important text away from edges. Print on the correct side of the sublimation paper. Let the transfer dry as directed.
3. Prepare the blank
Remove dust and lint. Pre-press fabric or soft blanks when appropriate. Do not use household cleaners, oils, or conditioners unless the blank manufacturer tells you to do so.
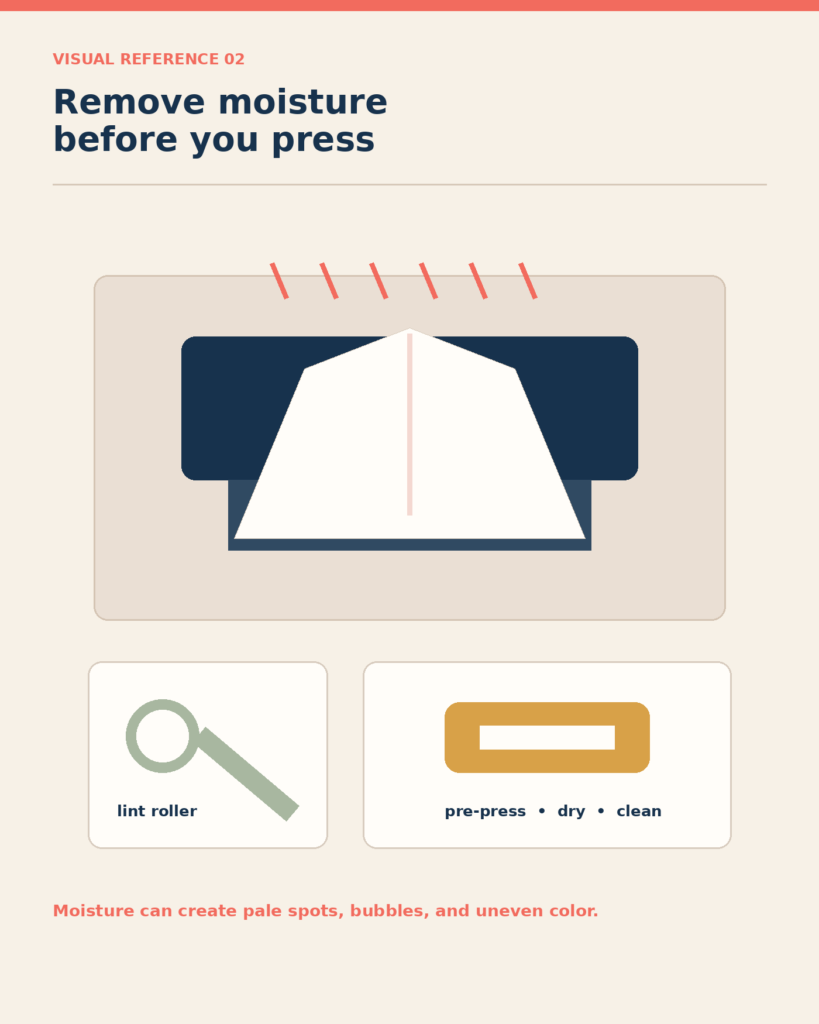
Illustration: Moisture removal and a clean surface are part of the setting—not optional extras.
4. Build the press sandwich
Use clean protective paper above and below the project. For apparel, place paper inside the garment. For flat hard blanks, use a clean sheet to protect the platen and reduce stray ink transfer.
5. Secure the transfer
Use heat-resistant tape or a compatible tack spray according to the product instructions. The transfer should not be able to slide when the press closes or opens.
6. Apply the starting setting
Set the temperature and time for the exact blank. Choose the recommended pressure. Avoid changing temperature, time, and pressure together because you will not know which change caused the result.
7. Peel and cool correctly
Peel according to the substrate instructions. Some products are designed for a quick peel, while others should cool before the paper is removed. Place hot flat blanks on a level surface so they cool without bending.
8. Inspect after cooling
Color can look different while a blank is hot. Inspect the surface after it has cooled. Check edges, small text, solid black areas, gradients, seams, and the reverse side for unwanted bleed-through.
Heat press time and temp chart sublimation troubleshooting
A heat press time and temp chart sublimation users can trust must always be paired with diagnosis. If the first test is wrong, do not immediately add 30 seconds or raise the temperature by 25 degrees. Identify the visual symptom first.
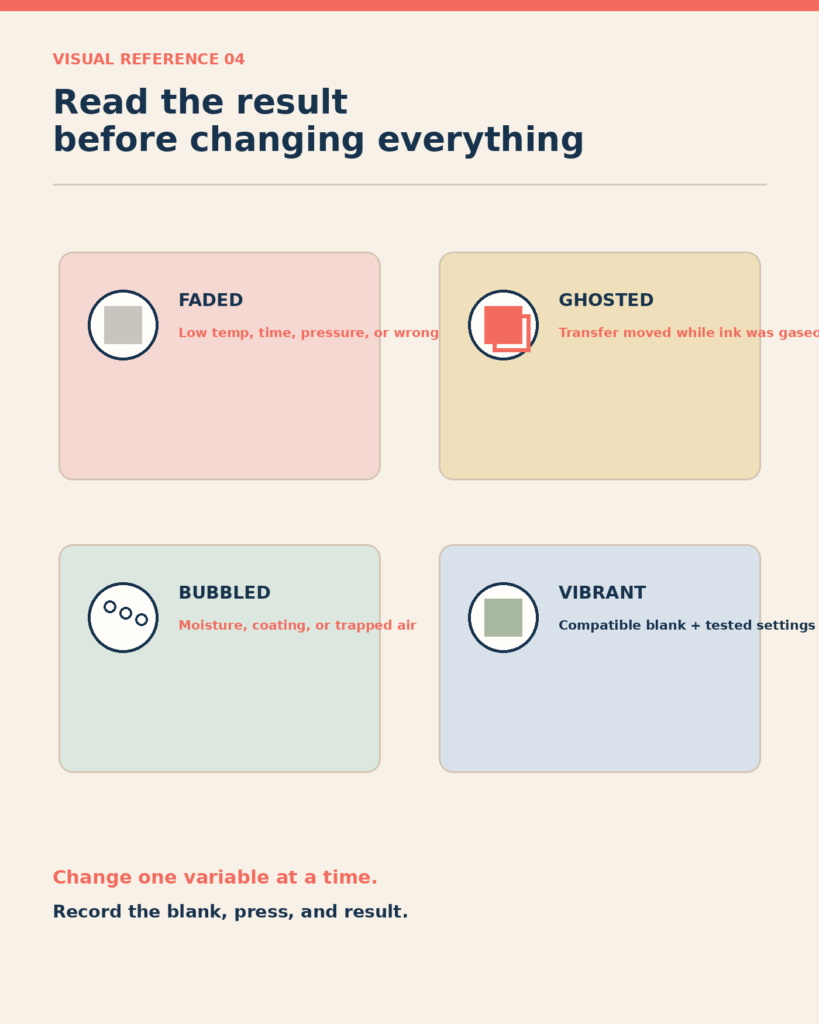
Illustration: Change one variable at a time and record what happened.
| Problem | Likely cause | First correction |
| Faded or washed-out color | Low heat, short time, weak pressure, damp blank, poor coating, or low polyester content | Confirm the blank, dry it, verify press temperature, and repeat a controlled test. |
| Blurry duplicate edge | Transfer moved while hot | Use more tape, open the press smoothly, and avoid dragging the paper. |
| Bubbles or pale dots | Moisture, trapped air, or surface contamination | Pre-press when appropriate, store blanks dry, and use clean protective paper. |
| Uneven transfer | Uneven platen pressure or blank not flat | Test the platen, reposition the blank, and use the correct pressure. |
| Yellow or brown scorching | Excessive heat, time, or a heat-sensitive coating | Follow the blank guide and reduce heat exposure only after testing. |
| Warped mouse pad or panel | Excess heat, uneven cooling, or pressure mismatch | Cool on a flat surface and use the manufacturer’s lower setting if supplied. |
| Paper sticks to the blank | Excess heat, wrong paper, or coating interaction | Confirm paper compatibility and follow the supplier’s peel method. |
| Dark or muddy colors | Color-management problem, wrong profile, or transfer printed incorrectly | Check printer settings, color workflow, and mirrored artwork. |
| Design has a blank edge | Artwork too small or blank/template dimensions incorrect | Measure the printable area and resize the file before pressing again. |
Sublimation heat press ideas for better results
The most useful sublimation heat press ideas are small process improvements that prevent waste.
First, keep a physical test log. Record the blank supplier, blank color, coating, press model, temperature, time, pressure, paper, ink, peel method, and result. A photo beside each test makes the log even more useful. When a particular shirt or tumbler works well, you can repeat the result instead of relying on memory.
Second, build a personal version of this heat press cheat sheet sublimation guide. Add your exact suppliers and product names beside the starting ranges. Over time, your chart becomes more accurate for your own machine and inventory.
Third, test the center and edges of the platen. If one area is consistently lighter, the problem may not be your transfer. The press may be heating unevenly or applying uneven pressure.
Fourth, store paper and blanks in a dry, stable environment. Moisture is one of the most common causes of pale spots, bubbles, and inconsistent color. If your climate is humid, allow blanks to acclimate and use pre-pressing where the manufacturer allows it.
Finally, avoid stacking too many variables into one experiment. The cleanest test changes one thing: temperature, time, pressure, paper, blank, or placement. This makes the next decision much easier.
How manufacturer charts should influence your process
Published charts are valuable because they give beginners a safe place to start. They are not interchangeable recipes. Sawgrass explicitly describes its chart as a starting point and tells users to use suitable substrates, calibrate the heat press, follow manufacturer guidelines, test, and practice. Joto Imaging Supplies likewise presents its table as a starting guideline and explains that pressure, temperature, time, paper, and substrate all affect the final result.
HeatPressNation’s instructions show why product details matter: its listed examples vary from polyester shirts at 385°F for 45–60 seconds to coffee mugs at 385°F for about 190 seconds, aluminum bottles at 365°F for 120 seconds, and slate at 420°F for five minutes. HTVRONT’s guide also gives broad ranges and recommends pre-pressing fabrics to remove moisture while noting that tumblers, mugs, fabrics, and other products need different approaches.
In practical terms, the chart tells you where to begin. The blank tells you which direction to test. Your finished sample tells you what to document.
Frequently asked questions
What is the best temperature for sublimation?
For many polyester projects, 385–400°F is a common starting range. The best temperature depends on the substrate, coating, thickness, press, paper, ink, and manufacturer’s instructions. Do not use a shirt setting for a mug or tumbler without testing.
How long should I heat press sublimation designs?
Thin polyester fabrics commonly take around 45–60 seconds. Ceramic mugs, tiles, glass, and slate often need longer. A tumbler may require 60–90 seconds per section or a rotation cycle. Use the blank’s instructions first.
Should I use light, medium, or firm pressure?
Medium pressure is a practical starting point for many flat sublimation blanks. Soft, thin, curved, or heat-sensitive products may need lighter pressure. Too much pressure can flatten or distort a blank, while too little may produce uneven coverage.
Why are my sublimation colors faded?
Check whether the blank is compatible, whether it was dry, whether the press reached the actual target temperature, whether the pressure was even, and whether the transfer was printed correctly. A faded image is not always caused by insufficient time.
Do I need to pre-press every sublimation blank?
No. Fabric and soft blanks often benefit from a short pre-press to remove moisture and wrinkles. A hard blank may require a different preparation step. Follow the product instructions and avoid adding heat unnecessarily.
Should I peel sublimation paper hot or cold?
There is no universal answer. Some blanks are designed for a quick peel, while others should cool before removal. Follow the manufacturer’s instructions and avoid moving the transfer while the ink is hot.
Can I use one sublimation heat press machine for every blank?
A flat press can handle many flat blanks, but mugs and tumblers usually need purpose-built attachments or equipment. The machine must provide suitable heat, pressure, size, and contact for the blank.
What should I do if the chart setting fails?
Stop and inspect the blank, transfer, press, pressure, moisture, and peel method. Record the result, change one variable, and test again. If the manufacturer provides a different range, use that range as the next controlled test.
Final checklist: your sublimation heat press settings reference
Before pressing, confirm the blank is sublimation-ready and the design is mirrored. Make sure the surface is clean and dry. Use the right paper and protective sheets. Secure the transfer so it cannot move. Set the temperature, time, and pressure for that exact blank. Open the press smoothly, peel according to the instructions, and cool the item flat when needed.
The best sublimation heat press settings are not the most extreme numbers. They are the settings that produce a repeatable result on a compatible blank with minimal waste. Start with this sublimation heat press chart, follow the supplier’s guide, test carefully, and build your own record of what works.
For related reading, connect this guide to SublimationCo’s Sublimation Mouse Pad Temp and Time Guide, Sublimation on Leather Guide, Sublimation on Cotton Guide, and 20oz Tumbler Sublimation Guide.
References
[1] Sawgrass Care: Sublimation Heat Press Settings
[2] Joto Imaging Supplies: Sublimation Heat Press Settings — Time, Temp & Pressure
[3] HTVRONT: Sublimation Guide — Temperature, Time and Pressure
[4] HeatPressNation: Transfer Instructions and Sublimation Substrate Chart
[5] SublimationCo: Sublimation for Beginners


2 Comments