This guide is for beginners who want a clear, repeatable workflow for printing sublimation transfers with a converted Epson EcoTank. Read the safety and compatibility notes before adding any ink.
If you are searching for Epson sublimation printer settings, you probably want one practical answer: which ink, paper, paper type, quality setting, color mode, and mirror option should you choose before printing your first transfer? This guide is also written for beginners setting up epson printer for sublimation for the first time; in natural English, that means setting up an Epson printer for sublimation. The answer is more nuanced than a single checkbox, but the setup becomes straightforward once you separate the printer’s job from the heat press’s job.
The printer creates a dry, mirrored transfer on sublimation paper. The heat press later turns the printed dye into a gas that bonds to polyester fibers or a compatible polymer coating. A beautiful pressed product depends on both stages, but the printer stage has its own rules. The wrong ink, wrong paper side, incorrect color management, or missing mirror setting can ruin a transfer before the press is even warm.
This beginner’s guide explains how to set up an Epson EcoTank for sublimation, how to approach the Epson ET-2803 sublimation printer settings, what to know about Epson 2760 sublimation printer settings, how to avoid common conversion mistakes, and how to create a test workflow you can repeat. It also explains the difference between a consumer Epson printer that has been converted and a purpose-built sublimation printer.
If you are new to the complete process, begin with SublimationCo’s Sublimation for Beginners: Complete Step-by-Step Guide. For the heat side of the process, use the Best Sublimation Heat Press Settings for Every Blank after your transfer is printed.
Quick answer: the best Epson sublimation printer settings for beginners
For many converted Epson EcoTank workflows, a useful starting point on Windows is Plain Paper or Bright White Paper, High Quality, and the ink supplier’s recommended color setting. Some third-party guides recommend Epson Vivid Color or automatic color correction for specific converted ET-2800 and ET-2803 workflows, but the correct choice depends on the ink brand, printer driver, operating system, and whether a color-management profile is being used.
Before pressing, beginners should confirm five things:
| Setting or step | Beginner starting point | Why it matters |
| Ink | Ink made for sublimation, from one compatible supplier | Standard dye or pigment ink is not sublimation ink. |
| Paper | Sublimation paper, printed on the coated side | The wrong side can produce weak or uneven transfers. |
| Paper type | Plain Paper or the paper supplier’s recommended option | Driver settings affect ink delivery and drying. |
| Quality | High or Best Quality for the first test | More ink is not automatically better, so test before production. |
| Color management | Start with the ink supplier’s recommendation | Avoid having the driver and design software correct color twice. |
| Mirror | On for designs that will be pressed face down | Prevents reversed text and graphics. |
| Connection | USB for the most stable first test | Wireless interruptions can create partial prints. |
| Drying | Allow the transfer to dry according to the paper instructions | Wet transfers can smear, ghost, or shift during pressing. |
There is no single universal setting for every converted Epson. Treat these values as a controlled starting point, not a guarantee. Epson’s consumer EcoTank pages describe the printers as ordinary home or office inkjet products, while purpose-built dye-sublimation models are sold as a different product category.
Can you use an Epson EcoTank printer for sublimation?
You can find many successful hobby and small-business workflows built around converted EcoTank printers, especially models with refillable tanks. However, a standard EcoTank is not automatically a sublimation printer. It becomes part of a sublimation workflow only after it is loaded with compatible sublimation ink and configured for sublimation paper.
That distinction matters because converting the printer can affect support and warranty coverage. A third-party Epson conversion guide warns that adding sublimation ink to a regular EcoTank may void the manufacturer’s warranty and may prevent Epson from providing normal technical support. This is a business and ownership decision, not merely a settings decision.
If you want manufacturer-backed support and a printer designed for sublimation ink, compare a purpose-built model such as Epson’s SureColor F170 with a converted consumer EcoTank. The purpose-built route usually costs more at the beginning, but it avoids the uncertainty of converting an office printer and may offer a more direct support path.
A converted printer can still be attractive for beginners because the initial equipment cost may be lower and refillable tanks are convenient. The important point is to choose deliberately. Do not buy a regular Epson printer, fill it with sublimation ink casually, and assume that the conversion is reversible. Once the ink path has been used, returning to ordinary ink can be unreliable or impractical.
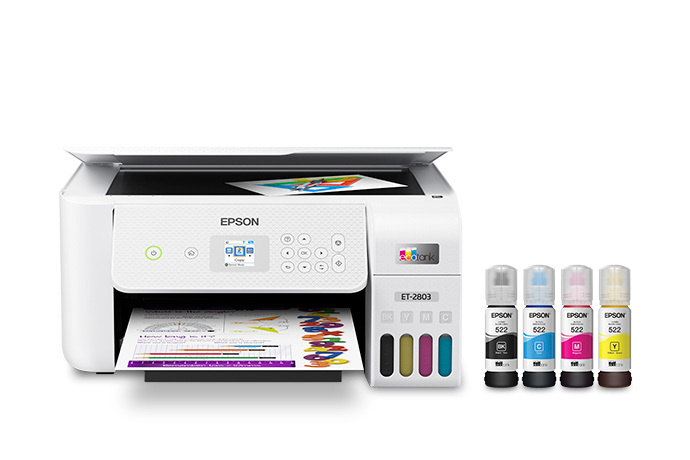
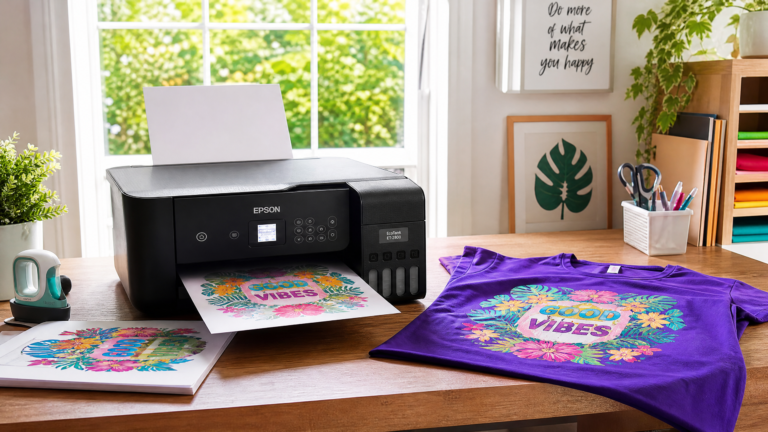
Real product photo: Epson EcoTank ET-2803. Photo source: Epson’s official ET-2803 product page. The ET-2803 shown here is a standard consumer EcoTank; using it for sublimation requires a separate conversion decision and compatible sublimation ink.
Epson printer for sublimation: what to check before buying
The phrase Epson printer for sublimation can refer to two very different products: a true Epson dye-sublimation printer or a consumer Epson inkjet that a user plans to convert. Before buying, check the model family, print width, driver availability, ink-tank design, and the size of your planned products.
Tank design and ink path
Refillable tanks are popular in conversion workflows because they can accept third-party ink more directly than some cartridge systems. However, the tank design does not make the printer officially compatible with sublimation. You still need the correct ink, a careful fill procedure, and a plan for avoiding cross-contamination.
Print size
Compact EcoTank models are useful for small transfers, mugs, ornaments, earrings, keychains, mouse pads, tote bags, and many small shirts. Their printable width may not cover a large adult shirt in one piece. If you want oversized all-over apparel, full-width panels, or large home décor, check the printer’s maximum paper size before purchase.
Driver support
You need a current driver for your operating system. A printer may work through Wi-Fi or a mobile app for ordinary documents but behave differently when you need paper-type controls, quality options, mirror printing, and color-management settings. Download the driver from Epson’s support area rather than relying only on a generic operating-system driver.
Maintenance access
Sublimation workflows benefit from regular use and routine nozzle checks. A printer that sits unused for long periods may develop ink-flow problems. Choose a model that is easy to inspect, clean, and maintain, and keep the printer in a dry, stable workspace.
Converting Epson printer to sublimation: what the process involves
The phrase converting Epson printer to sublimation often makes the process sound like a software setting. It is not. Conversion changes the ink used by the printer, so the physical preparation matters as much as the driver settings.
A typical conversion workflow begins by acquiring a new or unused compatible EcoTank, compatible sublimation ink, sublimation paper, gloves, absorbent material, and a way to identify each tank clearly. Starting with a new printer is strongly preferred because ordinary ink already in the ink path can contaminate the sublimation colors.
The printer should be set up according to Epson’s normal hardware instructions first, but do not fill the tanks with the included ordinary ink if the unit is being reserved for sublimation. Read the sublimation ink supplier’s instructions before opening bottles. Different suppliers may use different bottle caps, syringes, venting methods, and priming instructions.
Keep cyan, magenta, yellow, and black clearly matched to the correct tank. A small mistake in tank color can produce dramatic color shifts and may require extensive cleaning. Work slowly, wear gloves, protect the desk, and dispose of spills according to the product’s safety information.
After filling, the ink must reach the print head. That can take time and may require a controlled priming or nozzle-cleaning routine. Do not run repeated deep cleans without reading the ink supplier’s instructions because deep cleaning consumes ink and can create additional waste.
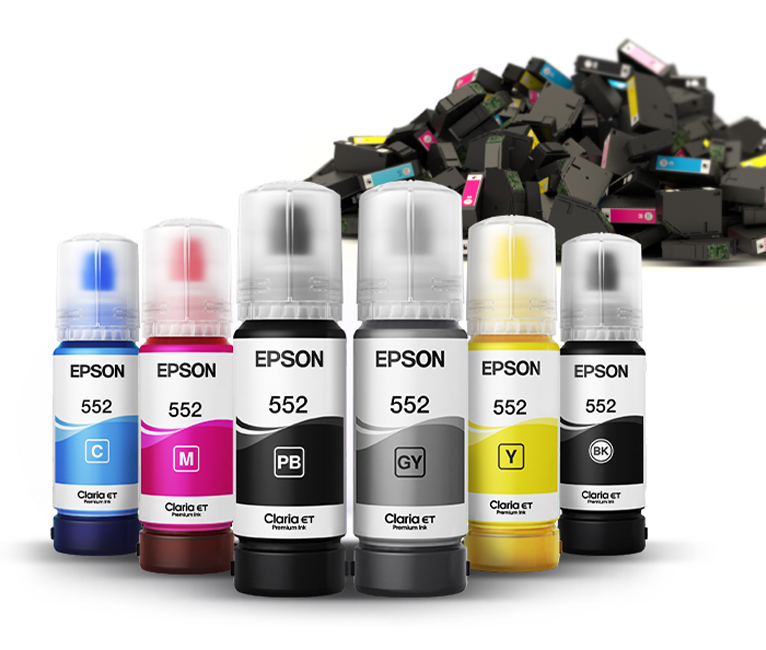
Real product photo: Epson EcoTank refillable ink bottles and tank system. Photo source: Epson’s EcoTank printer collection. This photo illustrates the physical tank concept; it is not a recommendation to use ordinary Epson ink for sublimation.
Illustration: Organize the supplies before conversion so the first fill is deliberate and each tank is identified correctly.
How to set up Epson printer for sublimation: a beginner workflow
The most useful answer to how to set up Epson printer for sublimation is a sequence that prevents avoidable mistakes. Complete each stage before moving to the next.
1. Choose the printer path
Decide whether you are using a converted EcoTank or a purpose-built sublimation printer. If you are converting, confirm that the printer is new or has not been filled with ordinary ink. Read the warranty and support terms before proceeding.
2. Install the printer hardware
Unpack the printer, remove shipping materials, connect the power, and complete the basic hardware setup. Install the current Epson driver from the official support page. Use USB for the first configuration if possible because it removes one common source of wireless interruptions.
3. Add compatible sublimation ink
Follow the ink manufacturer’s instructions, not a random video’s instructions. Fill the correct tank with the correct color. Keep caps and bottles organized, and record the ink brand and date of conversion for future troubleshooting.
4. Prime and run a nozzle check
Use the printer’s normal maintenance tools to move ink through the system. Print a nozzle-check pattern and inspect it under good light. Broken lines, missing colors, or unusual gaps should be fixed before printing a design.
5. Load sublimation paper correctly
Sublimation paper typically has a brighter or more coated side. The paper supplier should identify the printable side. Load one sheet at a time for the first test so you can confirm which side receives ink.
6. Configure the driver
Open the print properties rather than accepting the default document settings. Choose the paper type recommended by the ink or paper supplier. Many converted EcoTank guides begin with Plain Paper or Bright White Paper, High Quality, and a standard color mode.
7. Mirror the design
Mirror the artwork before printing unless the software or driver is already configured to mirror. This is essential for text, logos, directional graphics, and faces. A transfer that is not mirrored will press backward.
8. Print a small test
Use a small color chart, logo, or test design instead of a full shirt wrap. Let it dry, press it onto a compatible white polyester blank, and compare the result with the design on screen.
9. Document the result
Write down the printer model, ink brand, paper brand, software, driver settings, and heat-press settings. Your first successful workflow becomes the baseline for future projects.
Epson EcoTank printer for sublimation settings on Windows
For a converted Epson EcoTank printer for sublimation, Windows users often have access to a broader set of Epson driver controls. The names may vary by model and driver version, but the process is usually similar.
Open the design in your preferred software and choose Print. Select the Epson printer, then open Preferences or Properties. Choose the correct paper size and orientation. If your design has text or a directional image, enable mirror printing in the design software or print dialog, but not both.
Under paper or media type, start with the recommendation from your ink and paper supplier. Plain Paper or Bright White Paper is a common starting point for certain converted ET-2800 and ET-2803 workflows. Under quality, start with High or Best Quality. Avoid automatically selecting a photo paper option unless your ink supplier specifically recommends it because some photo settings may deliver a different amount of ink.
Color settings deserve special attention. If the printer driver is set to Automatic Color Correction and your design software is also managing color, the image may be corrected twice. For a beginner, the simplest workflow is to use the ink supplier’s recommended driver color setting and allow only one part of the system to manage color. Advanced users may later use an ICC profile, but an ICC profile must match the exact ink, paper, printer, and workflow.
Illustration: Check paper, quality, mirror, and color controls before clicking Print.
Epson ET 2803 sublimation printer settings
Searches for Epson ET 2803 sublimation printer settings are common because the ET-2803 is frequently discussed in beginner conversion tutorials. The model is a compact EcoTank designed for ordinary printing, not an official sublimation model. Community and third-party guides describe it as a convenient conversion candidate, but their recommendations are not Epson’s official sublimation settings.
A sensible starting configuration for a converted ET-2803 is:
| Driver area | Starting point for a first test |
| Paper size | Match the actual sublimation paper. |
| Paper type | Plain Paper or Bright White Paper, unless the ink supplier says otherwise. |
| Quality | High Quality. |
| Color correction | Use the ink supplier’s recommended mode; avoid double color management. |
| Mirror | Enable once in the design software or print dialog. |
| Borderless | Leave off unless the specific paper and design require it. |
| Connection | USB for the first test. |
| Drying | Follow the sublimation paper instructions before pressing. |
The ET-2803’s small format can work well for mugs, ornaments, small apparel, keychains, earrings, and other compact blanks. It may not be the best choice for large adult-shirt designs because printable width and margins limit the artwork area. One third-party review notes that the ET-2800 and ET-2803 are closely related retail variants and discusses the printer’s printable margins and driver setup in detail.
Do not copy a color setting from another ET-2803 user unless the ink, paper, software, and operating system are the same. Two people can use the same model and get different results because their ink formulations and color-management choices differ.
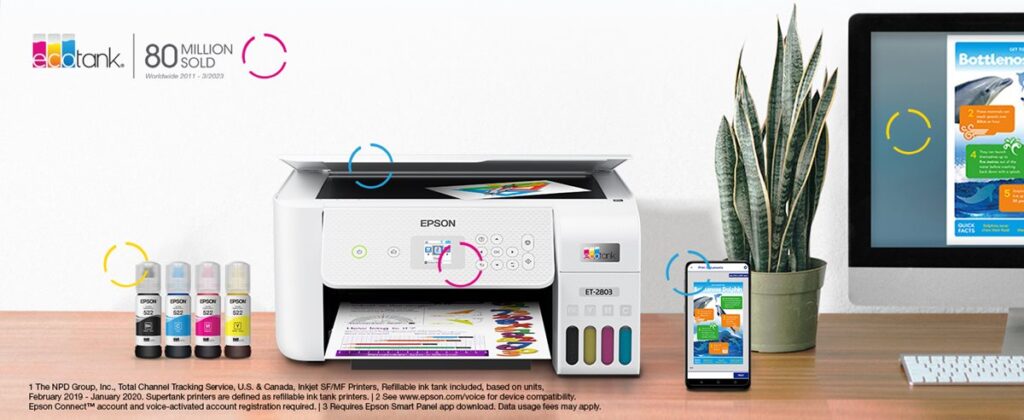
Real product photo: Epson ET-2803 shown with its refillable tank design. Photo source: Epson’s official product listing. The visible tank system explains why this model is often discussed in conversion workflows, but it does not make the printer an official sublimation model.
Epson 2760 sublimation printer settings
The Epson 2760 sublimation printer settings search usually refers to the EcoTank ET-2760. Like the ET-2803, the ET-2760 is a consumer EcoTank frequently used in third-party conversion workflows rather than a purpose-built sublimation printer.
Start with the same principles: use a clean printer, use only compatible sublimation ink, install the correct driver, begin with the ink supplier’s paper-type and quality recommendations, mirror the design once, and test the output on a compatible blank. Cosmos Ink’s setup guide lists the ET-2760 among the EcoTank models used in conversion tutorials and points readers toward Epson’s website for the correct drivers.
Because the ET-2760 is an older model family, driver menus may differ from newer EcoTank models. Look for the same functional controls even if the labels are slightly different: media type, print quality, color correction, paper size, orientation, and mirror printing.
If colors look too dark, do not immediately reduce ink density or change multiple settings. First confirm that the transfer is dry, the paper is correct, the image is not being color-managed twice, and the heat press workflow is correct. A printer can produce a transfer that looks dull before pressing and still produce a vibrant final product. Compare the pressed result, not only the paper on the desk.
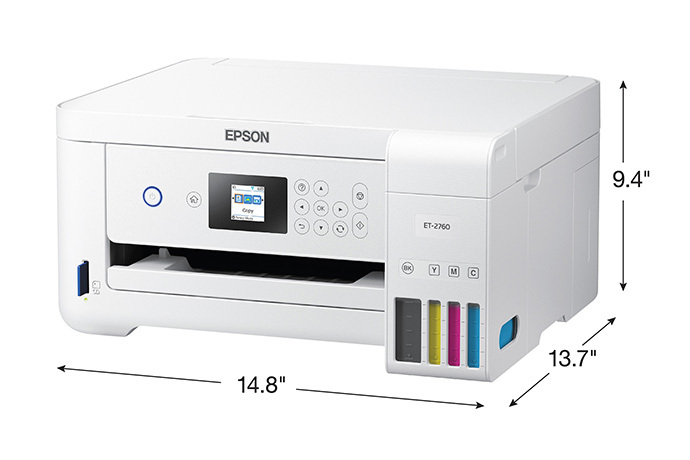
Real product photo: Epson EcoTank ET-2760. Photo source: Epson’s EcoTank product and support pages. Always confirm the exact driver and model documentation before applying a conversion workflow.
Convert Epson printer sublimation: common mistakes to avoid
People searching convert Epson printer sublimation often want a quick shortcut. The most expensive shortcuts are usually preventable.
The first mistake is converting a printer that already contains ordinary ink. Residual ink can mix with sublimation ink and create unpredictable colors. The second is assuming that the included Epson ink should be used for sublimation. It should not be treated as sublimation ink unless the product is specifically sold and labeled for that purpose.
The third mistake is buying paper without confirming the printable side. The fourth is forgetting to mirror the artwork. The fifth is printing a full-size design before confirming nozzle health and color output. The sixth is changing the printer driver, design software, ICC profile, and heat-press settings all at once.
Another common issue is leaving the printer unused for weeks. Sublimation ink systems need a maintenance routine. Follow the ink supplier’s storage and maintenance instructions, print periodic nozzle checks when recommended, and keep the printer away from excessive heat, dust, and humidity.
Test print and heat-press validation
A printer setup is not complete when the test sheet comes out of the machine. It is complete when the printed transfer produces an acceptable pressed result on a compatible blank.
Choose a small design with a solid black area, a skin-tone or warm color, a cool color, a gradient, and small text. Print it on sublimation paper using your starting settings. Let it dry according to the paper instructions. Then press it on white polyester or another compatible blank using the blank manufacturer’s heat settings.
A properly printed transfer may look lighter or less vibrant than the finished product before pressing. That alone does not prove that the printer setting is wrong. Inspect the pressed sample for banding, missing colors, muddy shadows, bleeding, ghosting, and sharpness.
Illustration: A small test reveals more than a full production run when you are still calibrating the workflow.
Create a simple record like this:
| Item to record | Example |
| Printer | Converted Epson EcoTank model |
| Ink | Supplier and ink version |
| Paper | Brand, weight, printable side |
| Software | Design program and version |
| Driver | Epson driver version |
| Print settings | Paper type, quality, color correction, mirror |
| Blank | Polyester shirt, mug, tumbler, mouse pad, or panel |
| Heat press | Temperature, time, pressure, peel method |
| Result | Color, sharpness, defects, next change |
Epson sublimation printer troubleshooting
When a converted sublimation Epson printer produces poor results, start with the printer and paper before changing the heat press. Use a nozzle check to separate ink-flow problems from color-management problems.
| Symptom | Likely printer-side cause | What to check first |
| Horizontal lines or banding | Nozzle gaps, draft-quality mode, or paper-feed issue | Run a nozzle check and confirm High Quality. |
| One color missing | Incorrect tank fill, air in the ink path, or clogged nozzle | Check the tank label and follow the supplier’s cleaning instructions. |
| Colors look wrong | Wrong ink profile, double color management, or mixed ink | Confirm the ink brand and let one system manage color. |
| Transfer is too wet | Wrong media type or excessive ink delivery | Try the supplier’s paper setting and allow more drying time. |
| Design prints backward | Mirror setting missing or applied twice | Mirror once, then verify text orientation on the paper. |
| Partial print | Wireless interruption, paper feed, or driver issue | Use USB and confirm paper size and margins. |
| Faded pressed result | Blank, press, moisture, or temperature issue | Test the printer transfer on a known compatible blank. |
| Smearing | Incorrect side of paper, wet transfer, or handling too soon | Confirm printable side and drying instructions. |
| Paper curls | Humidity, storage, or paper-feed tension | Store paper flat and follow the supplier’s handling advice. |
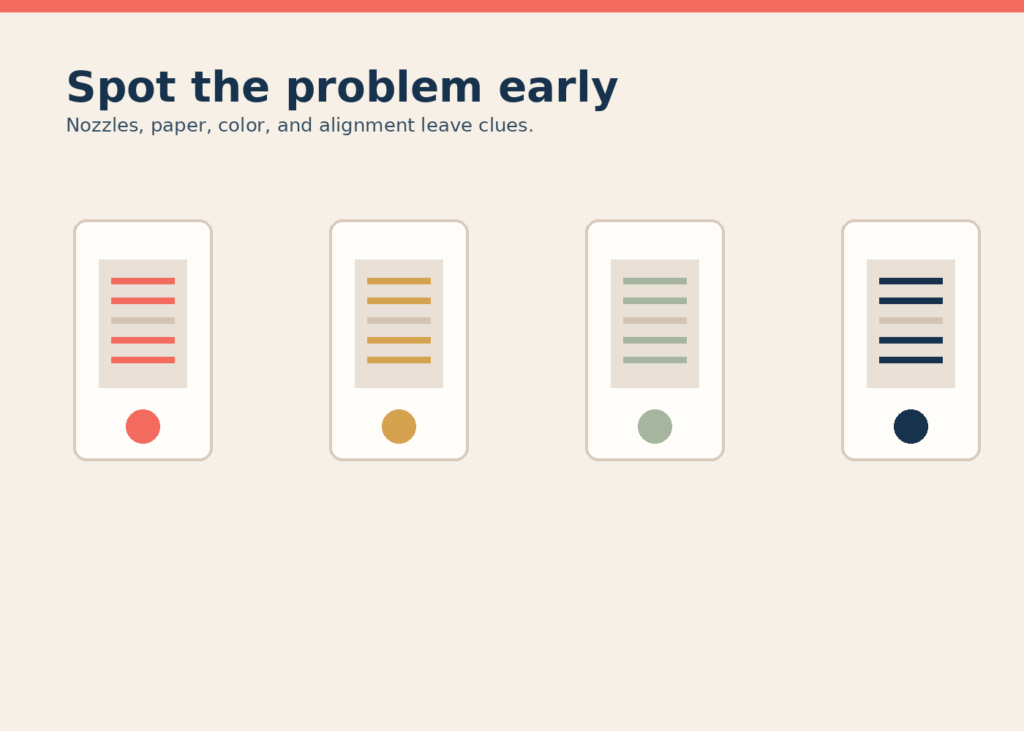
Illustration: Look for patterns in the defect. Banding suggests a printer-side issue; fading may involve the blank or heat press.
Epson printer settings for sublimation and color management
Color management is the part of Epson printer settings for sublimation that often feels most confusing. The monitor, design software, printer driver, ink, paper, and heat press all influence the final color.
A beginner should avoid changing everything at the same time. Start with the ink supplier’s recommended workflow. If the supplier provides an ICC profile, use it only with the matching ink and paper combination. If the supplier recommends automatic correction, use that first. If you later switch to application-managed color, disable the competing driver correction according to the software instructions.
Do not judge a transfer solely from the paper. Sublimation ink is designed to change during heating. The pressed result is the meaningful reference. Keep your monitor reasonably calibrated, but remember that the final item may have a different color range than the screen.
Black is a useful diagnostic color. If black appears green, brown, or washed out, check mixed ink, color profiles, and paper before increasing heat. Skin tones and neutrals can reveal color-management errors that bright colors hide.
How to set up Epson printer for sublimation on Mac
The same core principles apply on Mac, but the driver layout may look different. Install the correct Epson driver, select the printer in the Print dialog, open the detailed settings, and confirm paper size, media type, quality, color handling, and mirror orientation.
Some Mac workflows expose color management through a different panel than Windows. If the ink supplier provides separate Mac instructions, follow those instructions. Do not assume that a Windows setting name maps exactly to the same Mac control.
Print a small test, press it on a compatible blank, and record the result. The goal is not to copy another user’s screen settings. The goal is to establish a repeatable profile for your printer, ink, paper, software, and blank.
Should beginners convert an Epson EcoTank or buy a sublimation printer?
There is no universal winner. A converted EcoTank may suit a beginner who wants a lower-cost entry point, accepts the warranty limitations, and is comfortable following a careful ink and maintenance process. A purpose-built sublimation printer may suit a beginner who values manufacturer support, a documented ink system, and a simpler setup.
Compare the total workflow rather than only the printer price. Include ink, paper, heat press, blanks, protective paper, software, maintenance, wasted transfers, color testing, and your time. The cheapest printer is not necessarily the cheapest system if it produces inconsistent color or requires repeated troubleshooting.
For small gifts and compact blanks, a small EcoTank format may be sufficient. For large apparel, the printer’s maximum paper size becomes more important. For a growing business, repeatability and support may matter more than the lowest initial cost.
Beginner FAQ
Can any Epson EcoTank become a sublimation printer?
Not automatically. Conversion depends on the model, ink path, tank design, available drivers, compatible sublimation ink, and the user’s willingness to accept warranty and support limitations. Always verify the specific model and ink supplier before converting.
What are the best Epson sublimation printer settings?
Start with the ink and paper supplier’s recommendations. A common converted-EcoTank starting point is Plain Paper or Bright White Paper, High Quality, one color-management method, and mirror printing enabled once. Test the result on a compatible blank before producing a batch.
What are the Epson ET 2803 sublimation printer settings?
For a converted ET-2803, many third-party workflows begin with Plain Paper or Bright White Paper, High Quality, the supplier’s color mode, and a single mirror setting. The exact best option depends on the ink, paper, software, driver, and operating system.
What are the Epson 2760 sublimation printer settings?
Use the ET-2760 driver’s paper type, quality, color correction, paper size, and mirror controls. Start with the ink supplier’s recommended configuration and validate it with a small pressed test. Older driver versions may present the controls under different names.
Do I mirror sublimation prints?
Yes, designs with text or directional graphics normally need to be mirrored before pressing. Mirror the design once, either in the design software or the print workflow, not both.
Why does my sublimation print look dull before pressing?
Sublimation transfers often look less vibrant before heat activates the dye. Judge the result after pressing on a compatible blank. If the final product is still dull, investigate ink, paper, blank coating, moisture, heat, time, pressure, and color management.
Should I use plain paper or photo paper for sublimation?
Use the paper type recommended by the ink and paper supplier. Plain Paper or Bright White Paper is a common starting point for some converted EcoTank workflows, but photo settings may be correct for a different ink and paper combination.
Can I switch a converted Epson back to regular ink?
Do not assume that switching back will be reliable. Ink mixing and residue in the ink path can affect color and performance. Treat a converted printer as dedicated to sublimation and make the conversion decision before filling the tanks.
Is a converted Epson EcoTank better than a real sublimation printer?
It depends on your priorities. A converted EcoTank may lower the initial cost, while a purpose-built sublimation printer offers a more direct manufacturer-supported path. Compare support, reliability, format, ink cost, and your expected production volume.
Final Epson sublimation printer settings checklist
Before your first production print, confirm that the printer model is appropriate for your chosen workflow and that the ink is specifically made for sublimation. Install the correct driver, fill tanks carefully, run a nozzle check, load the printable side of the paper, choose the supplier’s starting media and quality settings, mirror the design once, and print a small test.
Then press the transfer on a compatible blank using the manufacturer’s heat settings. Record the result. If the sample is not right, change one variable at a time. Do not jump between random online settings because the same Epson model can produce different results with different ink, paper, software, and blank combinations.
The best Epson sublimation printer settings are the ones that produce a repeatable result for your exact system. Start carefully, document everything, and let your own test results become the reference you use for every future project.
For the next step, explore SublimationCo’s Sublimation Printer Buyer’s Guide, Sublimation Heat Press Settings Chart, Sublimation on Cotton Guide, and Sublimation Tumbler Tutorial. Together, these articles create a useful beginner content cluster around printer setup, transfer production, pressing, and product selection.
References
[1] Sublimakers Academy: Converted Epson EcoTank ET-2800 and ET-2803 Sublimation Printer Review
[2] Epson: Expression ET-2803 Wireless Color All-in-One Supertank Printer
[3] Epson: Dye-Sublimation Printers
[4] Epson: ET-2800 Support and Drivers
[5] Cosmos Ink: How to Set Up Epson EcoTank Models for Sublimation



3 Comments