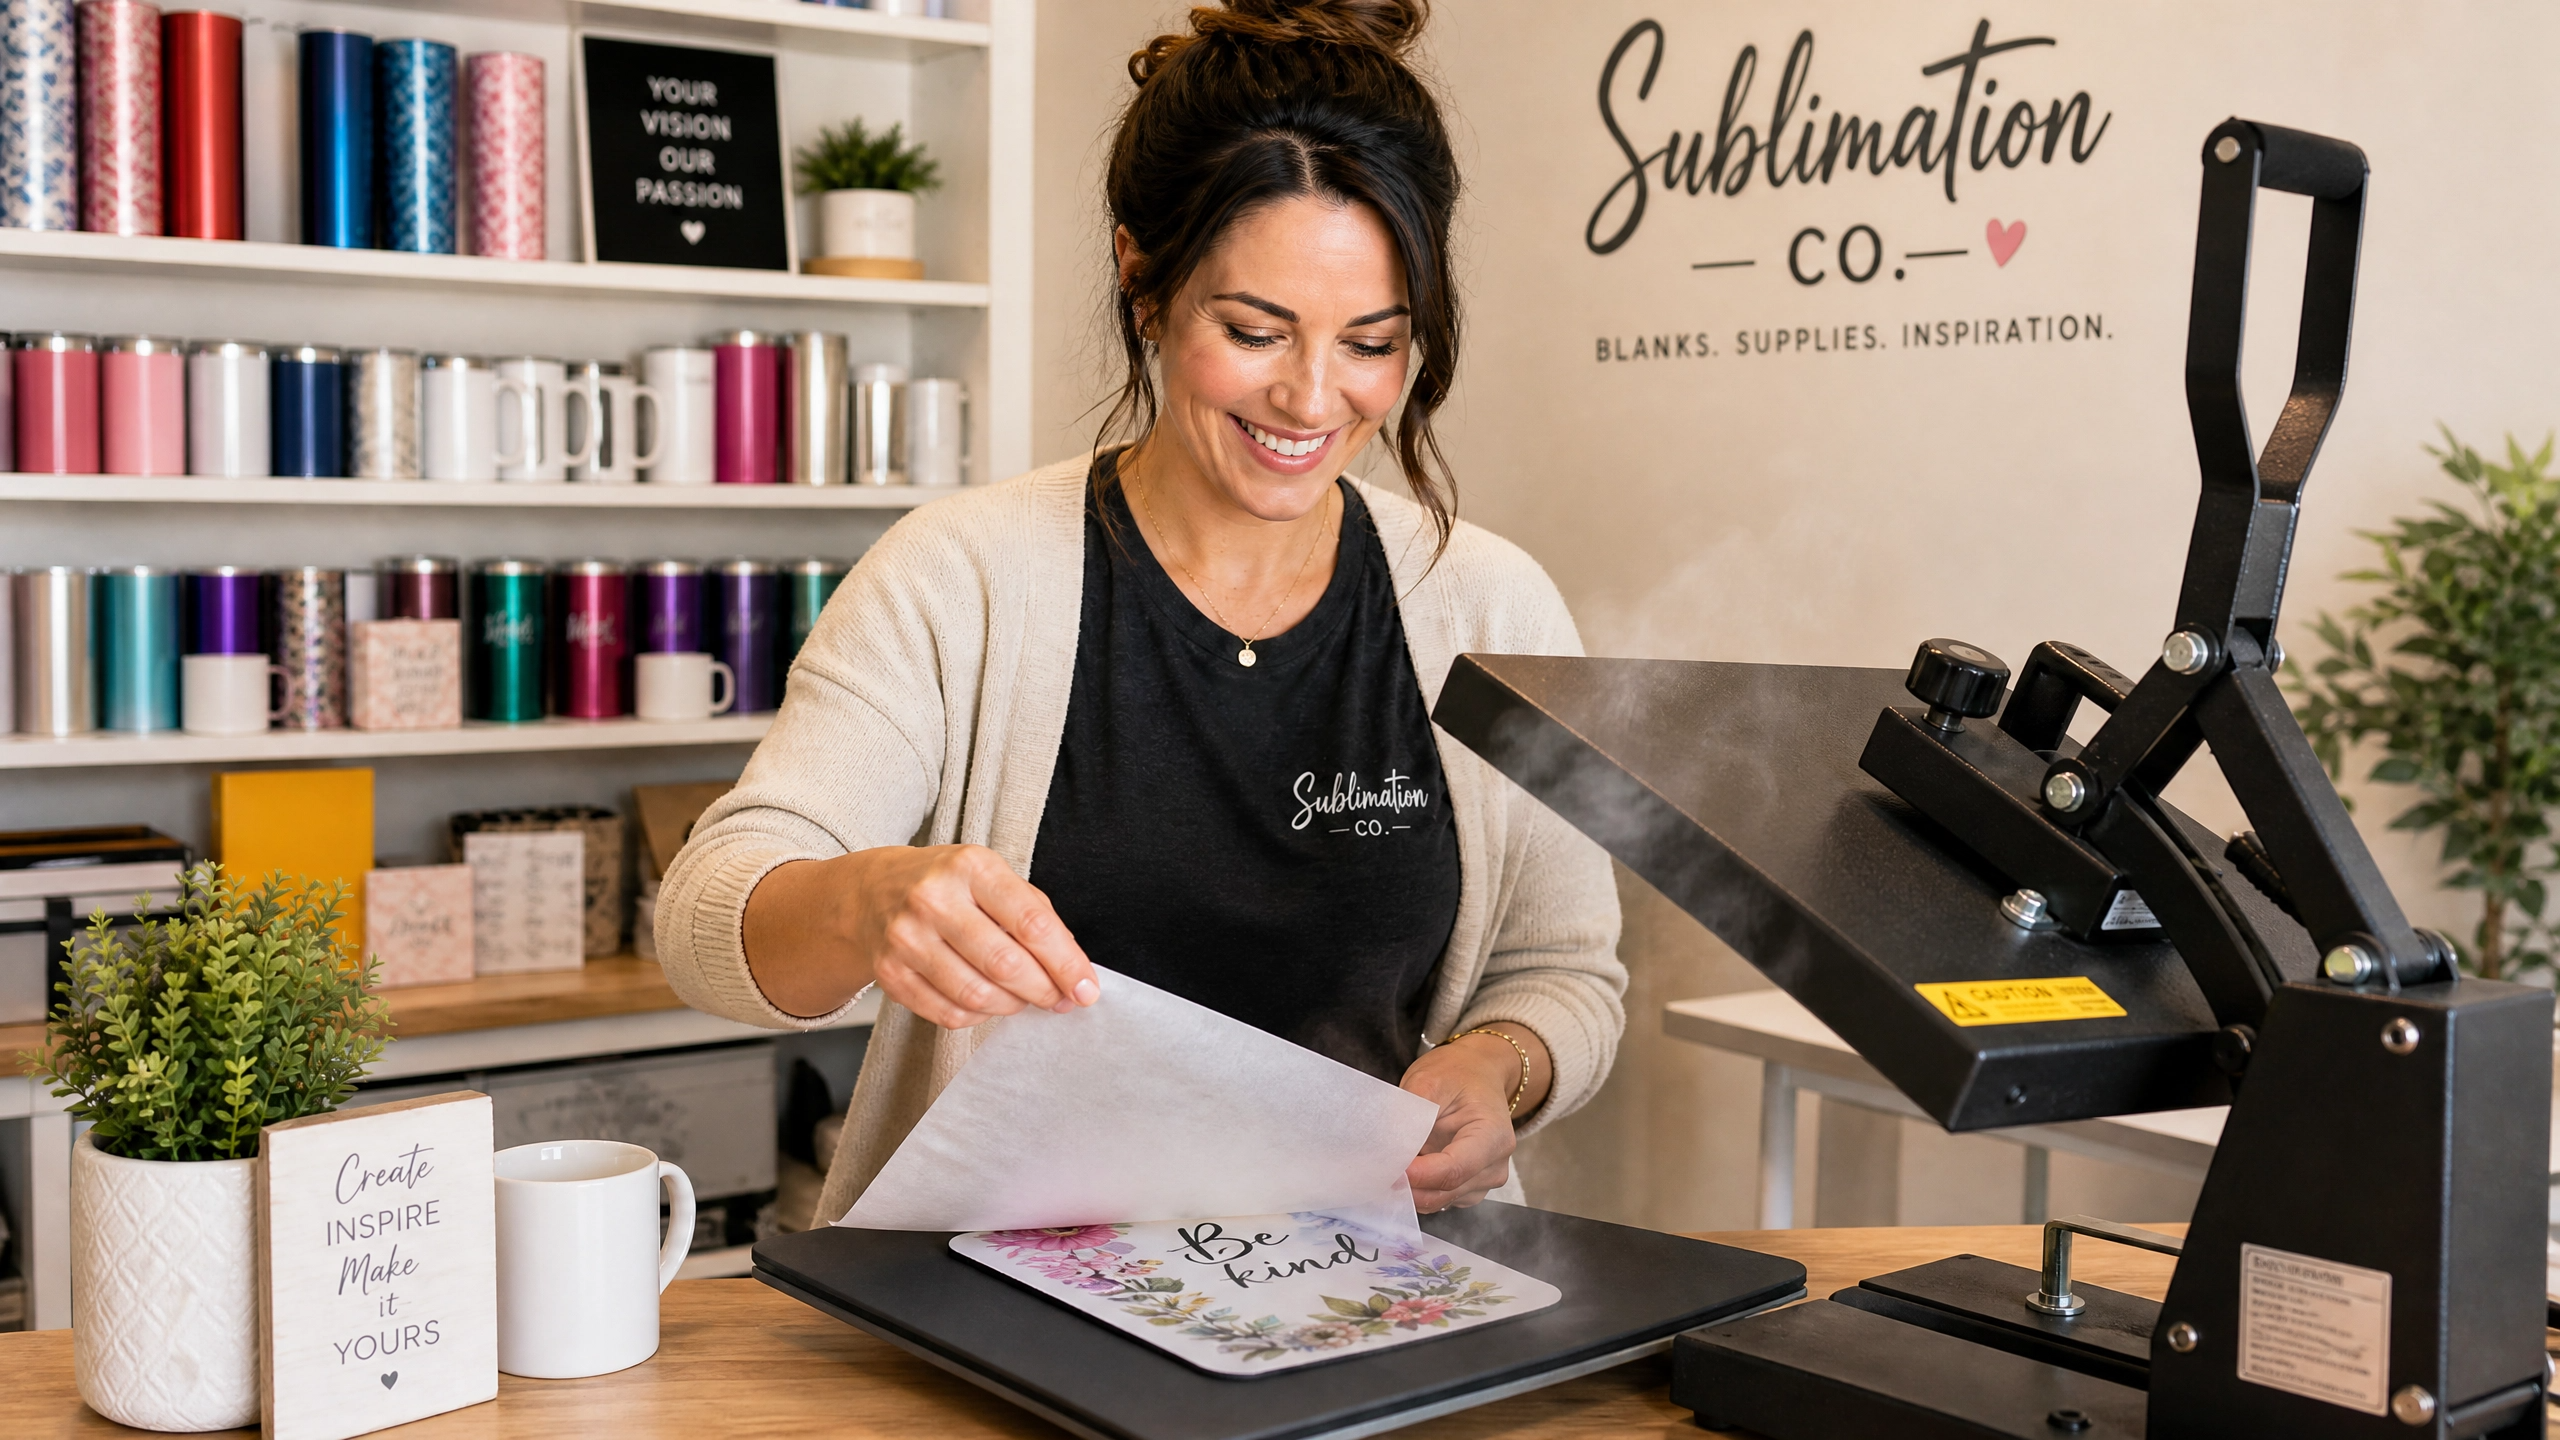
Sublimation Mouse Pad Temp and Time: The Ultimate 7-Step Heat Press Guide
For most white polyester-top neoprene mouse pad blanks, begin at 385°F (196°C) for 50–60 seconds with medium-firm pressure. Some manufacturers specify 400°F (205°C) for 40–45 seconds, so the blank’s instructions should always take priority. Pre-press the blank to remove moisture, secure the transfer so it cannot move, and test one blank before production.
The best sublimation mouse pad temp and time settings
If you searched for the correct sublimation mouse pad temp and time, you probably want one dependable starting point rather than a long list of conflicting numbers. The most useful starting profile for a standard neoprene mouse pad is 385°F for 50–60 seconds at medium-firm pressure. This profile is practical for many craft presses and gives the foam-backed blank enough time to receive the dye without unnecessarily extending the heat exposure.
There is no universal setting that works for every mouse pad. The polyester coating, neoprene thickness, rubber backing, paper, ink, platen size, and actual press temperature all influence the result. Sawgrass describes its chart as a starting point and lists neoprene at 400°F for 45 seconds with medium pressure, while HeatPressNation recommends 400°F for 40 seconds with medium pressure for its process. That difference is not a contradiction; it is evidence that the blank and the press matter.
For a new blank, use this decision rule:
1.Start with the manufacturer’s instructions.
2.If no instructions are available, test 385°F for 55 seconds at medium-firm pressure.
3.If the transfer is pale and the press is confirmed accurate, add 5–10 seconds or move toward 400°F.
4.If the rubber backing smells strongly, curls, or shows heat damage, reduce temperature or time and confirm that the blank is rated for sublimation.
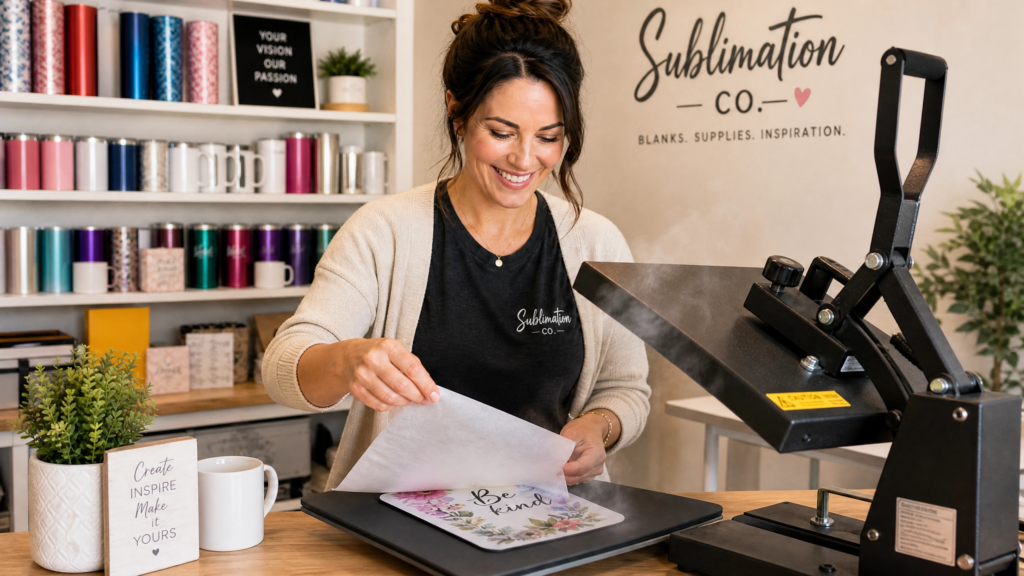
Image caption: The transfer should be secured and removed consistently after the press cycle. Image source: SublimationCo’s complete mouse pad tutorial.
What do 385°F and 400°F mean in Celsius?
A setting of 385°F is approximately 196°C, while 400°F is approximately 205°C. Use one unit consistently on the controller and remember that the displayed temperature is not always the temperature at the substrate. Entry-level presses may have hot and cool zones or may read differently from an infrared thermometer. A test blank is therefore more reliable than copying a number without validating the equipment.
How long to sublimate a mouse pad?
For a standard neoprene blank, the practical range is 40–60 seconds. A 40-second cycle at 400°F can work well for a blank designed for that profile. A 50–60-second cycle at 385°F is a gentler alternative used by many crafters. Extra-large gaming pads may need to be pressed in sections, but overlapping sections can create visible seams or uneven color. If the design is larger than the platen, use a press and workflow approved by the blank manufacturer rather than improvising.
Why mouse pad blanks need different treatment
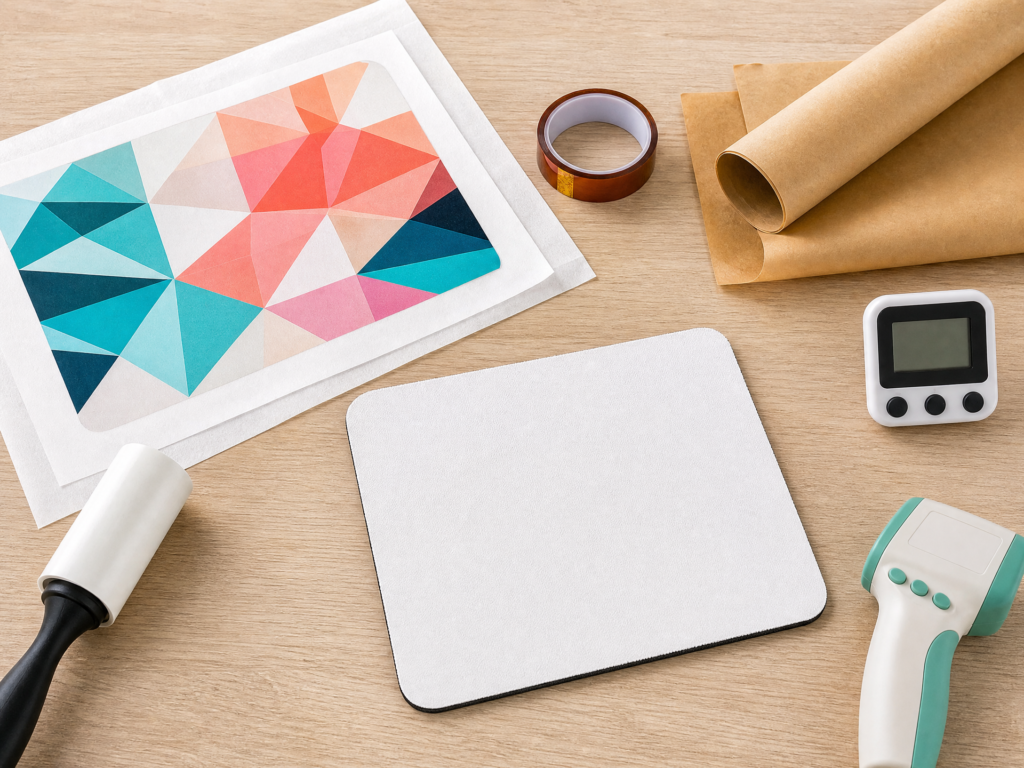
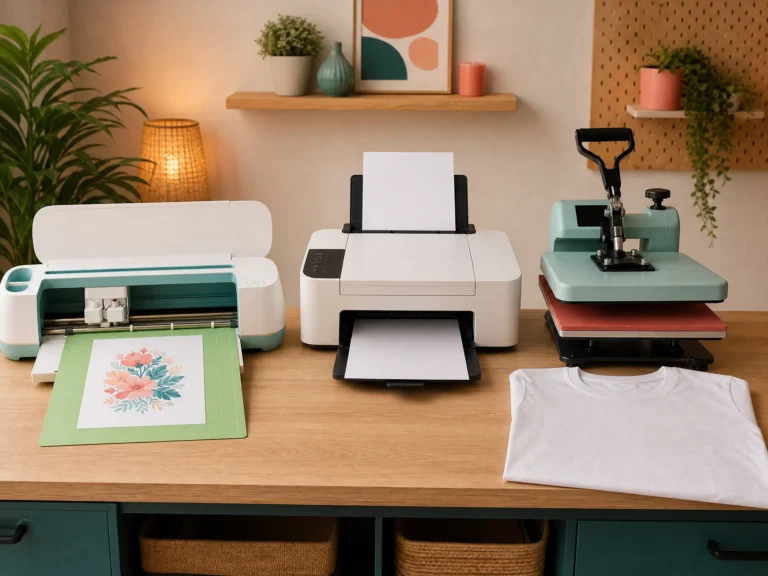
Preparation image: Gather the blank, transfer paper, protective paper, tape, lint roller, and temperature-checking tools before heating.
Sublimation is a heat-transfer process in which specially formulated dye-sublimation ink is converted into gas and bonds with a compatible polyester surface. The printable face of a sublimation mouse pad is usually white polyester fabric or a polyester coating over neoprene. The rubber or foam backing is not the part receiving the ink.
This distinction explains why a regular black rubber mouse pad cannot simply be sublimated. A blank must have a white, sublimation-ready polyester top. Sublimation does not add white ink, so the color of the top surface influences the final design. An off-white surface can make a print appear warmer, while a textured or uneven coating can reduce sharpness.
Neoprene is a foam material. It can retain moisture, and moisture can become steam when the blank is heated. Steam may push against the transfer and create bubbles, pale patches, or uneven edges. That is why pre-pressing is not an optional “extra step” when the blank has been stored in a humid environment.
The thickness of the blank also changes pressure. A thick mouse pad can resist the closing motion of a small clamshell press. Too little contact pressure may produce weak edges; too much pressure may compress the foam, leave platen marks, or contribute to warping. Aim for even medium pressure, not the maximum force your machine can apply.
For a full materials list, design sizing guidance, and a complete production workflow, link prominently to Sublimation Mouse Pad Tutorial: Complete Step-by-Step Guide. This settings article is designed to complement that tutorial, not replace it.
Settings table for common blank variations
The table below is a testing framework, not a substitute for the blank manufacturer’s application sheet. Record the brand, thickness, paper, ink, press model, temperature, time, pressure, and result for every test.
| Mouse pad or process | Temperature | Time | Pressure | Peel / cooling guidance | Best use |
| Standard neoprene blank, no instructions | 385°F / 196°C | 50–60 sec | Medium-firm | Hot peel; cool flat | Reliable starting point |
| Blank rated by manufacturer for 400°F | 400°F / 205°C | 40–45 sec | Medium | Follow blank instructions | Shorter production cycle |
| Sawgrass general neoprene starting point | 400°F / 205°C | 45 sec | Medium | Follow substrate guidance | Manufacturer reference profile |
| HPN-style standard mouse pad process | 400°F / 205°C | 40 sec | Medium | Peel after a brief pause | Product-specific reference |
| Moisture-prone or recently unpacked blank | 385°F / 196°C | Pre-press 50–60 sec; then normal cycle | Medium | Cool completely after pre-press | Prevent bubbles and pale areas |
| Thin blank that curls or scorches easily | 375–385°F / 191–196°C | 45–55 sec | Light-medium to medium | Remove promptly; cool flat | Reduce heat stress after testing |
| Extra-large gaming pad larger than platen | Manufacturer’s profile | Manufacturer’s profile | Even pressure | Avoid uncontrolled overlaps | Use a suitably large press |
| Small test swatch from the same blank | Same as production profile | Same as production profile | Same as production | Evaluate after cooling | Validate before selling |
The reason for the range is simple: time and temperature work together. Increasing temperature can shorten the cycle, while lowering temperature may require more time. Pressure must remain even so the printed sheet and polyester surface stay in full contact. Change one variable at a time; otherwise, you will not know which adjustment fixed or caused the problem.
What to do before pressing
Choose the correct blank
Confirm that the product is explicitly described as a sublimation mouse pad or as a mouse pad with a white polyester-coated top. Look for a smooth printable surface, a flat backing, and consistent thickness. Avoid blanks with oily residue, heavy lint, visible delamination, or a top layer that is already yellowed.
If you sell finished products, keep a sample from every blank batch. Different lots can respond differently even when the listed dimensions are the same. A simple batch log is one of the most effective ways to reduce repeat failures.
Pre-press to remove moisture
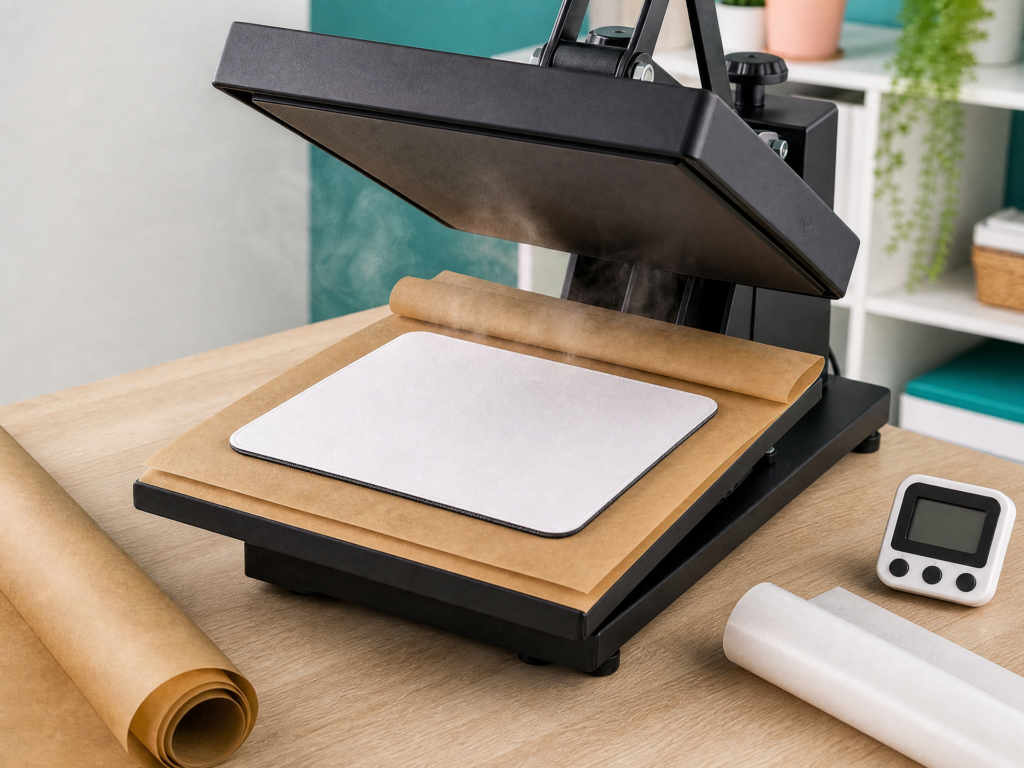
Pre-press image: Dry the blank with protective paper before applying the printed transfer.
Place the bare blank on the lower platen with protective paper beneath it. Press it at the planned working temperature for the planned time—often 385°F for 50–60 seconds—with medium pressure. Open the press and inspect the blank. If visible steam escapes or the surface feels damp, repeat the pre-press cycle.
Allow the blank to cool completely and lie flat before applying the transfer. Do not press a hot, moisture-filled blank and immediately add the design. Cooling gives the foam time to release residual moisture and return to its normal shape.
Some blanks may show little visible steam even when moisture is present. If a batch repeatedly produces bubbles or cloudy patches, extend the drying step, store blanks in a dry sealed container, and test a fresh blank. Follow the supplier’s safety instructions and avoid leaving the press unattended.
Prepare the design and paper
Use a sublimation printer, sublimation ink, and coated sublimation paper. Mirror the design before printing because the printed side will face the polyester surface. This is especially important when the design contains text, a logo, or directional artwork.
Print slightly larger than the blank when the design calls for edge-to-edge coverage. Trim away excess paper only if trimming makes placement easier. Keep the printed image dry and handle it by the edges so fingerprints and moisture do not transfer to the printable face.
Protect the press
Use clean butcher paper or parchment paper above and below the assembly. Replace protective sheets when they show ink bleed or creases. A dirty sheet can transfer unwanted color, while a crease can create a pressure line.
How to sublimate a mouse pad step by step
1. Lint-roll the printable surface
Run a lint roller over the white polyester surface immediately before placement. A hair, fiber, or speck of dust can create a white mark or a tiny unprinted line. Do not use a damp cloth immediately before pressing because added moisture works against the drying step.
2. Position the transfer
Place the printed side against the white polyester surface. The rubber side should face upward when the transfer and blank are assembled. Check all four edges before taping. A design that is slightly off-center is difficult to correct after heat is applied.
3. Secure every edge
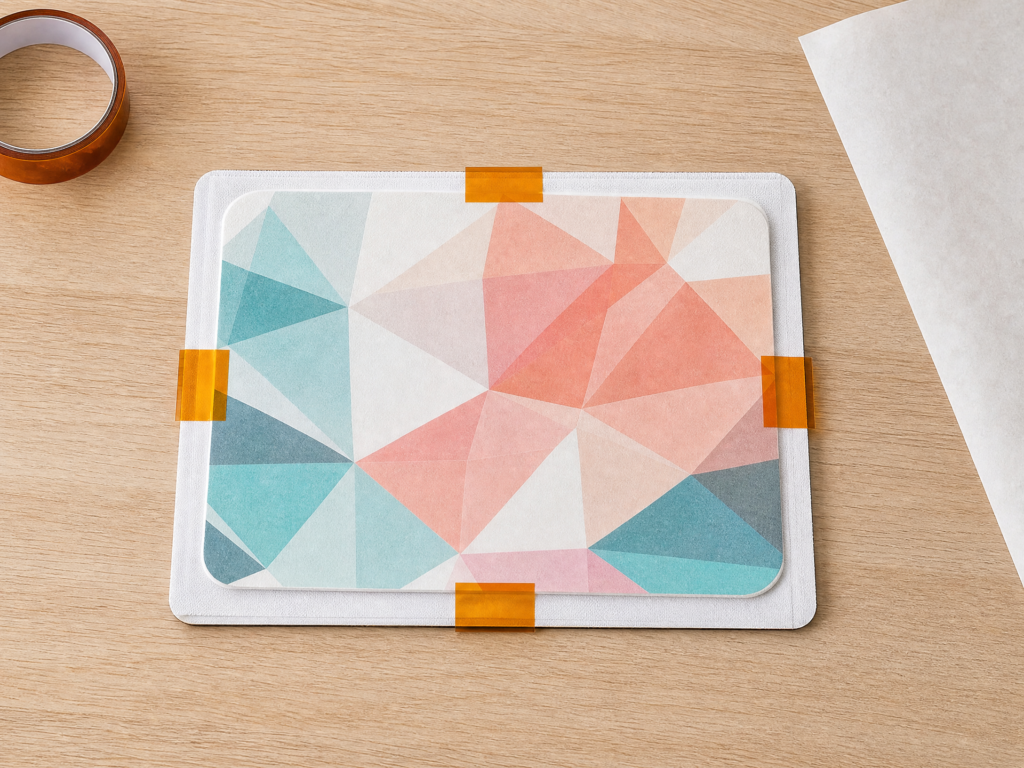
Placement image: Heat-resistant tape keeps the transfer aligned and helps prevent ghosting during the press cycle.
Use heat-resistant tape on the corners and along the edges. The purpose is not to stretch the paper; it is to stop the transfer from sliding when the press closes or opens. For a larger blank, add tape at the center of each side. Keep tape away from the main artwork when possible.
Ghosting occurs when the paper moves while the ink is hot. Even a small movement can create a blurry second outline. Secure placement is usually more effective than simply increasing temperature.
4. Build the press stack
Place protective paper on the lower platen. Set the mouse pad with the rubber side down and the sublimation paper facing up. Add protective paper on top. Ensure no tape, paper fold, or edge is caught under the press area.
5. Apply the chosen settings
For the default profile, set 385°F, 50–60 seconds, and medium-firm pressure. For a blank that specifically calls for 400°F, use its recommended cycle. Close the press smoothly and allow the timer to complete. Do not open and close the press halfway through the cycle, because that can disturb the paper and create a pressure or color boundary.
6. Remove the transfer consistently
When the timer ends, open the press and remove the mouse pad assembly in a controlled motion. If your blank supplier recommends hot peel, remove the paper while the pad is still hot. If the supplier recommends cold peel, let the assembly cool before separating it. Do not switch between methods randomly while troubleshooting.
7. Cool flat
Place the finished pad rubber-side down on a clean, flat surface. Allow it to cool completely before bending, stacking, or packaging. Cooling flat helps limit curl and allows you to judge the final color accurately.
Hot peel or cold peel?
A hot peel means removing the paper immediately after pressing. It can reduce the time that sublimation gas remains trapped between the paper and surface, and it is a common recommendation for mouse pad blanks. The risk is handling a hot, flexible pad too aggressively.
A cold peel means allowing the assembly to cool before removing the paper. Some substrates and suppliers prefer this because the material is more stable while being separated. The risk is that a paper left in contact with a hot surface may affect the appearance or make the separation less predictable.
There is no safe universal answer for every brand. Follow the blank’s instructions first. If instructions are missing, test hot peel and cold peel on identical blanks, then compare color, sharpness, paper release, and warping after the pads have cooled.
How to adjust your heat press
Pressure: medium is the target
Pressure should create full contact without visibly crushing the foam. On a manual press, close the platen until the stack is secure and the handle offers firm resistance. If the press cannot close evenly, the pad may be too thick for that platen or the pressure setting may be too high.
Temperature: trust the substrate and verify the machine
A displayed temperature is a target, not proof of actual surface temperature. If results are inconsistent across the platen, check the press with an infrared thermometer or a heat-press temperature test. An infrared reading can be affected by surface emissivity, so treat it as a diagnostic aid rather than an absolute laboratory measurement.
Time: adjust in small increments
If colors are slightly pale after confirming temperature and ink, increase time by 5–10 seconds. If the backing smells, curls, or becomes shiny, reduce time or temperature and test again. Avoid large changes such as moving from 385°F for 50 seconds to 420°F for two minutes; that makes diagnosis difficult and can damage the blank.
Press design and platen coverage
A swing-away or flat press can make it easier to position a thick blank and avoid dragging the upper platen across the transfer. A clamshell press can work well when it closes evenly. The key requirements are flat, consistent contact and enough platen area to cover the blank without unsupported edges.
Troubleshooting faded colors, ghosting, bubbles, and warping
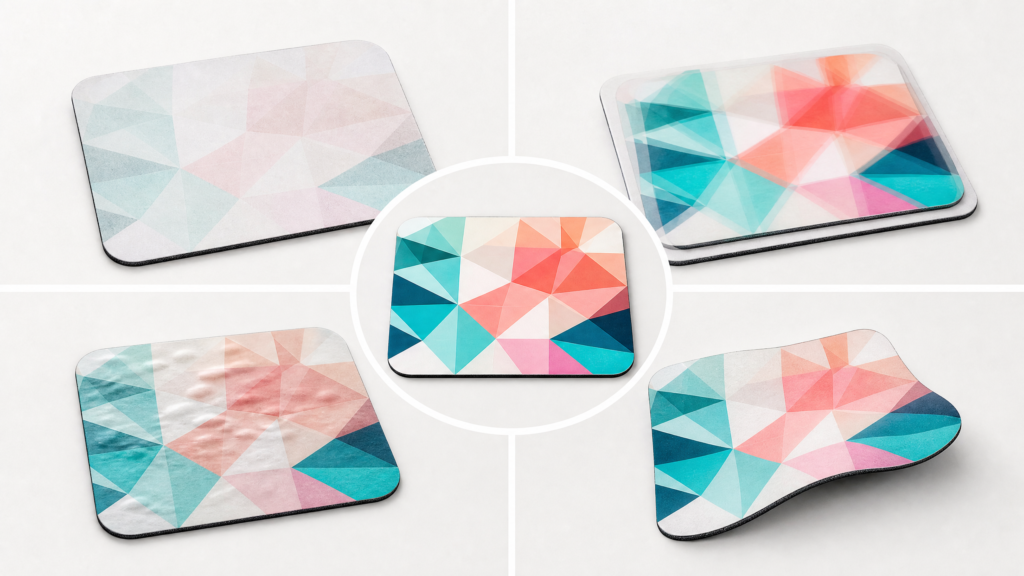
Troubleshooting image: Compare the visible defect first, then adjust only one process variable at a time.
Faded or washed-out colors
Faded colors usually indicate insufficient heat transfer, moisture, poor contact, an incorrect color workflow, or an unsuitable blank. First confirm that the design was printed with sublimation ink and that the blank has a white polyester surface. Then verify the actual heat, ensure the blank was pre-pressed, and check the transfer is fully face-down.
If the press is accurate and the blank is dry, add 5–10 seconds or move from 385°F toward the supplier’s 400°F profile. Do not compensate for a wrong paper or non-sublimation ink by increasing heat. Print a color test and compare the cooled result, not the appearance of the design on screen.
Ghosting or blurry double images
Ghosting is usually movement. The transfer may slide when the press closes, when the pad is removed, or when paper is peeled. Tape the corners and the center of each edge, keep the press stack flat, and remove the transfer with one smooth motion.
Do not lift and reclose the press during the cycle. If the design contains fine text, use extra care because small shifts are easier to see. A slight blur around an otherwise correctly colored design is a strong sign of paper movement rather than insufficient temperature.
Bubbling, pinholes, or uneven transfer areas
Bubbles and cloudy patches commonly point to trapped moisture, uneven contact, or a defective top coating. Repeat the pre-press until the blank is dry, cool it flat, and use fresh protective paper. If only one area is uneven, inspect the platen for a low spot, debris, or a crease in the paper.
Do not place a damp blank inside a plastic bag after pre-pressing. Store blanks in a dry area and allow them to reach room temperature before taping the transfer.
White spots and streaks
Dust, hair, lint, and paper debris can block the ink. Lint-roll immediately before placing the transfer. Keep the printable surface covered while preparing the press. Replace protective sheets that have loose fibers or heavy ink stains.
Scorching, shine, odor, or a rubbery surface
Scorching and strong odor suggest excess heat, excess time, an unsuitable backing, or a press that is hotter than its display indicates. Stop production and test a blank without artwork. Lower the temperature or time only after confirming the supplier’s recommended profile.
A faint temporary smell can occur with heated rubber or neoprene, but a sharp burnt odor, glossy distortion, or discoloration is not a quality target. Ventilate the workspace and follow the blank and press manufacturer’s safety guidance.
Warped or curled mouse pads
Warping can result from too much heat, uneven pressure, moisture, rapid handling, or an unsupported oversized blank. Pre-press and cool the blank flat. Avoid stacking hot pads. Use a flat press large enough to support the full product and do not bend the pad while the backing is still warm.
If a standard blank warps at 400°F for 40 seconds, test the supplier’s alternate profile at 385°F for 50–60 seconds. If warping continues, the backing may not be designed for sublimation or the press may be applying uneven heat.
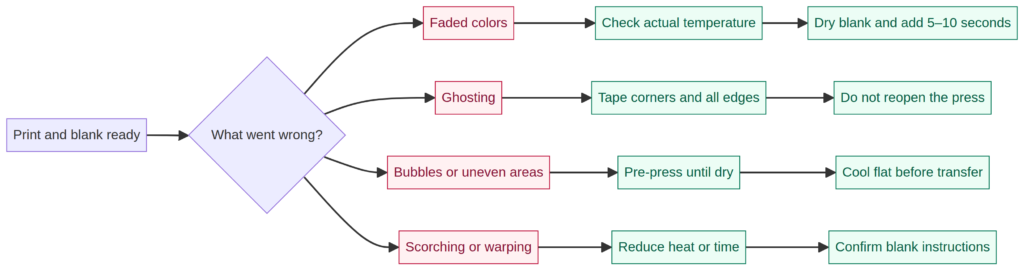
Illustration: Use the defect first, then change one process variable at a time.
Build a repeatable test matrix
When a new blank does not perform as expected, avoid changing temperature, time, pressure, paper, and artwork in the same test. Instead, create a small matrix using three identical blanks. Keep the artwork, printer, paper, and tape placement constant. Press the first blank at 385°F for 50 seconds, the second at 385°F for 60 seconds, and the third at the manufacturer’s 400°F profile. Let all three cool flat before comparing them.
Record four observations: color density, edge coverage, sharpness, and physical condition of the backing. A good test is not merely the brightest one. The winning profile should produce a clean image without bubbles, shiny spots, strong odor, edge distortion, or curl. If all three tests fail in the same way, the problem is probably the blank, paper, ink, or press calibration rather than the exact number of seconds.
For production work, keep the successful test beside the press as a reference sample. Write the blank brand, thickness, date, temperature, time, pressure, pre-press cycle, and peel method on the back. This turns the vague question “what is the sublimation mouse pad temp and time?” into a documented recipe that another person can repeat.
If you change suppliers, move to a different platen, switch paper, or work in a much more humid season, run a fresh test. A short test cycle costs less than remaking a large order, and it protects the consistency of your finished products.
Colors look different from the screen
A monitor displays light; a printed transfer and finished polyester surface reflect light. Color management, printer settings, sublimation ink, paper, and the heat cycle all affect the result. Use the ICC profile recommended for your ink system when available, and print a small swatch before committing a large design.
Sawgrass specifically notes that suitable substrates, a calibrated press, color management, manufacturer guidelines, testing, and practice all contribute to quality results. This is why changing temperature alone is rarely a complete color solution.
Frequently asked questions
What is the best sublimation temp for a mouse pad?
For many standard neoprene blanks, begin at 385°F (196°C). If the blank’s instructions specify 400°F, use 400°F (205°C) instead. The best setting is the one validated on your exact blank and heat press.
What is the recommended mouse pad sublimation time?
A common range is 40–60 seconds. Use 40–45 seconds at 400°F when the blank manufacturer recommends that profile, or test 50–60 seconds at 385°F for a general starting point. Pre-pressing is a separate drying cycle and does not replace the final transfer cycle.
Do I need medium or firm pressure?
Use even medium pressure, increasing slightly toward medium-firm only when needed for full contact. Maximum pressure is not automatically better and may compress or distort the foam-backed blank.
Should I pre-press a sublimation mouse pad?
Yes. Pre-pressing helps remove moisture and flattens the blank before the transfer is applied. If steam or bubbling remains, repeat the pre-press and cool the blank before continuing.
Can I press a mouse pad with an EasyPress?
A large EasyPress may work for a standard-size blank if it covers the full printable area and applies even pressure. A flat clamshell or swing-away press generally provides more consistent coverage for thicker neoprene. Test before producing a sellable item.
Can I sublimate on a regular rubber mouse pad?
No. The printable face must be white polyester or a compatible polyester coating. Standard rubber, cotton, and uncoated fabric do not provide the surface required for dye sublimation.
How do I keep the design from moving?
Mirror the print, place it face-down, and tape the corners and edges with heat-resistant tape. Move the assembly carefully and peel consistently. Do not open and close the press during the cycle.
Why does the paper stick to my mouse pad?
Paper can stick because of excessive heat, excess time, an unsuitable paper, ink bleed, or a surface coating problem. Follow the blank’s instructions, use clean protective paper, and compare the supplier’s recommended peel method.
CTA: choose a mouse pad sublimation template
A reliable heat-press setting deserves a design that is sized correctly. Browse the mouse pad sublimation designs and templates from SublimationCo to find a ready-to-press starting point, then adapt the artwork to your blank’s exact dimensions. For broader project ideas, readers can also explore Sublimation for Beginners: Complete Step-by-Step Guide.
Before selling a design with a recognizable brand, sports mark, character, or quote, confirm that you have the rights to use it commercially. Original artwork, licensed assets, and properly licensed templates are safer choices than copying a protected logo.
Final checklist
Before pressing, confirm that the blank has a white polyester printable surface, the artwork is mirrored, and the paper and ink are compatible. Pre-press the blank, let it cool flat, lint-roll the surface, and secure the transfer on every side.
For the first test, use the manufacturer’s setting. If no setting is available, start with 385°F for 50–60 seconds at medium-firm pressure. Keep a record of the result after cooling. Adjust one variable at a time, and never assume that a hotter or longer cycle automatically creates a brighter print.
The most important lesson is consistency. Good sublimation mouse pad temp and time settings are not just numbers on a heat press display. They are the combination of a compatible blank, a dry and flat surface, accurate heat, even pressure, secure placement, and a repeatable peel and cooling routine.
References
[1] Sawgrass Care: Sublimation Heat Press Settings
[2] HeatPressNation: How To Sublimate A Mouse Pad
[3] SublimationCo: Sublimation Mouse Pad Tutorial: Complete Step-by-Step Guide
[4] SublimationCo: Sublimation for Beginners: Complete Step-by-Step Guide