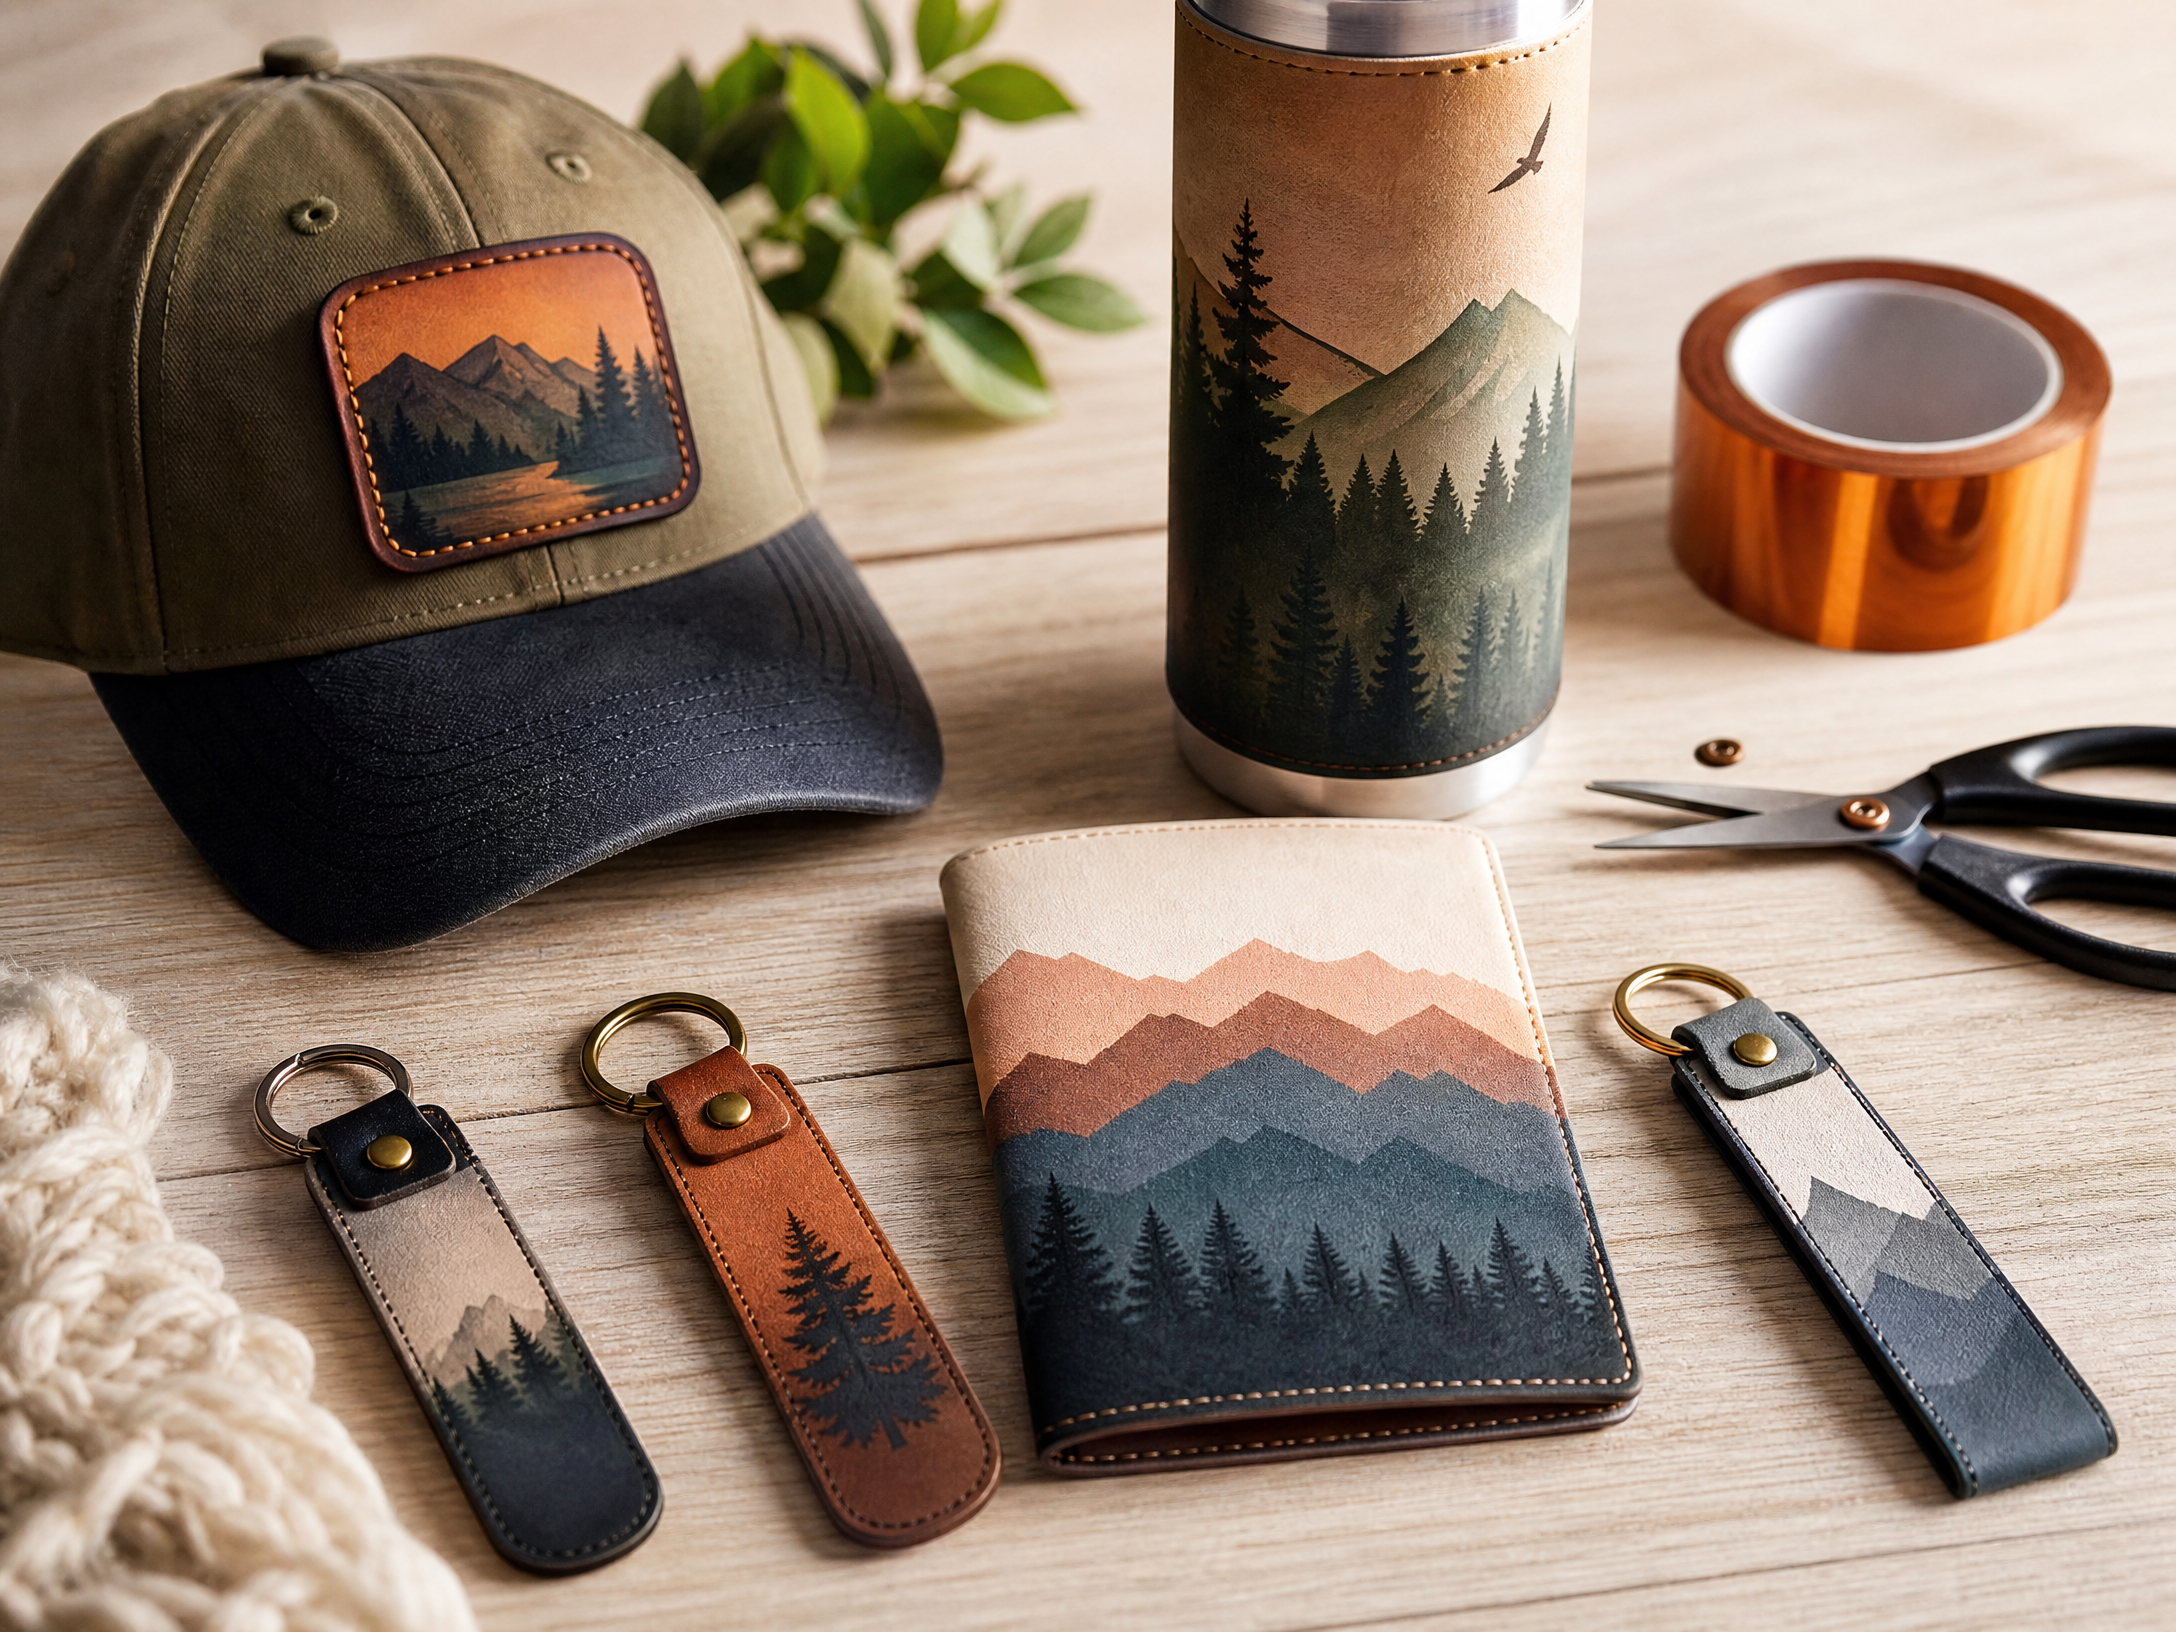
Can You Sublimate on Leather? The Complete Guide to Faux Leather Sublimation
Yes, you can sublimate on leather-like materials—but not on every type of leather. The deciding factor is not whether a blank looks like leather. The real question is whether the printable surface contains polyester or a purpose-built polymer coating that can accept sublimation ink.
That distinction explains why a sublimation design may look vivid on a purpose-made faux-leather patch yet appear faint, blurry or completely washed out on untreated natural leather. In this guide, you will learn exactly how sublimation on leather works, which materials are suitable, how to choose a blank, how to press it safely, and how to troubleshoot the most common failures.
If you are new to dye sublimation, begin with Sublimation for Beginners: the complete step-by-step guide before testing specialty substrates. It will help you understand printers, sublimation paper, color management and heat-press fundamentals.
Quick answer: can you sublimate on leather?
You generally cannot use standard dye sublimation directly on untreated natural leather. Traditional sublimation relies on a printable polyester or polymer surface. Sawgrass defines sublimation as a process in which solid dye becomes a gas under heat and pressure, then bonds with polyester fibers or a polymer coating rather than sitting on top of the item.
You can sublimate on the following materials when the manufacturer identifies them as compatible:
| Material | Standard sublimation suitability | Why |
| Untreated natural leather | No | It does not provide the polyester or purpose-made polymer surface required by standard sublimation ink. |
| Sublimation-ready faux leather | Yes | The printable face is manufactured to accept sublimation ink. |
| PU leather blank labeled for sublimation | Usually yes | PU is a polyurethane material, but the exact face coating and construction still matter. |
| Coated real leather | Product-specific | It may work if the coating is designed and tested for sublimation. |
| Unknown vinyl, PVC or leather-look material | Do not assume | Heat compatibility, fumes and transfer performance are unknown. |
The safest rule is simple: buy a blank specifically labeled for sublimation and follow that blank’s application instructions. A product may look identical to a sublimation blank but behave completely differently under heat.
What happens during sublimation?
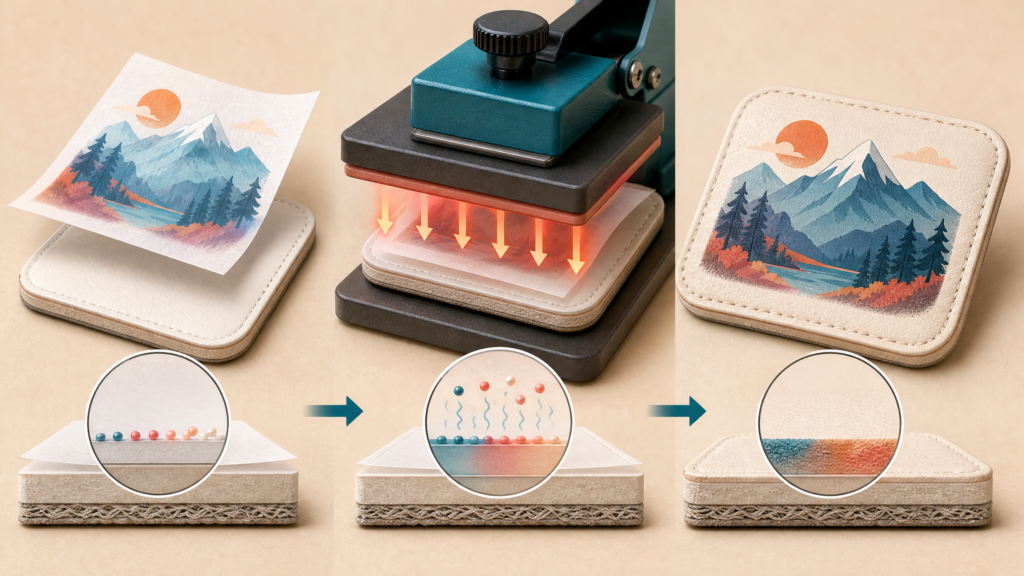
Dye sublimation is a heat-transfer process in which sublimation ink changes from a solid state into a gas and bonds with polyester fibers or a polymer coating. The image becomes part of the compatible surface instead of forming a separate film on top. That is why a successful sublimation print normally has no thick edge, peeling carrier or raised layer.
This chemistry also creates the main limitation. Sublimation ink needs the right receptive surface. Sawgrass lists traditional Sublijet UHD applications for white or light-colored 100% polyester, polycotton and hard substrates, while its product guidance distinguishes traditional sublimation from other transfer systems. In other words, the word “leather” describes the appearance or construction of the blank; it does not automatically prove that the blank can accept sublimation ink.
Natural leather is an organic material with a complex surface of fibers, oils, finishes and tanning treatments. Without a suitable receptive coating, standard sublimation ink has no reliable polymer layer into which it can bond. Pressing longer or hotter does not solve that chemical mismatch. It is more likely to discolor, harden, warp or damage the leather.
Why faux leather is usually the better starting point
Sublimation-ready faux leather is often the most approachable option for beginners because it is sold in predictable sheets, patches, key fobs, passport covers and wraps. Its printable face is designed for heat decoration, and many blanks include a recommended temperature, time and pressure range.
For example, HeatPressNation’s SubliCraft PU passport holder lists a starting range of 350–375°F for 40–60 seconds with medium pressure, while also warning that the final settings vary according to the press, artwork and other factors. This is a product instruction—not a universal recipe for every faux-leather blank. Always test the exact product you intend to sell.
Natural leather versus faux leather for sublimation
The terms “real leather,” “faux leather,” “PU leather,” “vegan leather” and “leatherette” are not interchangeable from a pressing standpoint. They describe different materials and finishes, and some product listings use the terms loosely. Read the technical specification and application instructions rather than relying on a photograph or title alone.
Untreated natural leather
Untreated or conventionally finished natural leather is not a standard sublimation substrate. It may darken or develop a surface mark under a heat press, but that does not mean the design has been permanently sublimated into it. If your goal is to decorate genuine leather, investigate a process designed for leather, such as laser engraving, leather paint, foil, screen printing or a compatible transfer system. The best method depends on the leather finish and the intended use.
Sublimation-ready faux leather and PU leather
A sublimation-ready faux-leather blank is the preferred choice for this project. Look for language such as “sublimation compatible,” “sublimation PU leather,” “printable faux leather” or “polymer-coated leather blank,” along with application instructions from the manufacturer.
The blank should also have a surface that is flat, clean and free of protective film before pressing. If the supplier says to remove a film, remove it. If the supplier says to leave a liner in place, follow those instructions instead. Construction details vary significantly between patches, wraps, journals, passport holders and sheets.
Special coated real leather
Some specialty products combine genuine leather with a printable coating. These may work, but the coating—not the leather itself—is what makes standard sublimation possible. Treat such blanks as product-specific. A successful test on one coated leather product does not validate another brand or finish.
Supplies you need for sublimation on faux leather
A reliable setup does not require every accessory in the craft aisle. It requires compatible materials, a press that reaches and maintains the recommended temperature, and a repeatable way to secure the transfer.
| Supply | Purpose | Selection guidance |
| Sublimation printer and compatible ink | Creates the transfer | Use an ink system intended for your printer and substrate. Do not mix ink types casually; follow the printer manufacturer’s guidance. |
| Sublimation paper | Holds the printed design before pressing | Choose paper designed for dye sublimation and use the recommended print side. |
| Sublimation-ready faux leather | Receives the design | Confirm the exact product is designed for sublimation. |
| Flat heat press | Applies even heat and pressure | Suitable for sheets, patches and flat accessories. Calibrate it if possible. |
| Mug or tumbler press | Applies heat around a curved wrap | Use only with blanks designed for that type of press. |
| Heat-resistant tape | Prevents transfer movement | Secure edges without placing tape over important artwork when possible. |
| Butcher paper or protective paper | Protects the press and blank | Use clean sheets to reduce the risk of ink bleed or ghosting. |
| Heat-resistant gloves | Protects hands during unloading | Especially useful for thicker wraps and products that must be folded while warm. |
| Ruler, cutting tool and lint-free cloth | Supports clean preparation | Remove dust and measure the imprint area before printing. |
Sawgrass also explains that sublimation paper is coated to hold the printed design until heat releases it onto the substrate. That is why ordinary printer paper is not an equivalent substitute.
How to sublimate on faux leather: step-by-step
The following workflow is a safe starting point for a sublimation-ready faux-leather sheet or patch. The exact settings must come from the blank supplier whenever they are available.
1. Confirm the blank and read its instructions
Before designing anything, check the product page, insert card or downloadable template. Record the recommended temperature, dwell time, pressure, peel method and whether the product should be folded, shaped or cooled immediately after pressing.
Do not proceed with an unknown leather-like material simply because it is inexpensive. A test blank costs far less than a ruined batch, a damaged press or an unhappy customer.
2. Prepare the artwork
Measure the printable area and create the design with enough margin for trimming or stitching. Use a high-resolution file, check the color profile used by your printer workflow and keep important text away from the edges.
Mirror the artwork before printing. This is especially important for names, monograms, dates and logos. If you forget to mirror the transfer, the finished design will read backward.
3. Print the transfer
Print on the correct coated side of your sublimation paper. Let the transfer dry according to the paper and ink instructions, and avoid touching the printed image unnecessarily. If you are making several products, print a small proof first so you can confirm scale, color and placement.
4. Prepare the faux leather
Remove dust, fibers and packaging residue with a clean, dry cloth. If the supplier instructs you to remove a protective film, do so before pressing. Do not apply household cleaners, oils or conditioners unless the blank manufacturer specifically recommends them.
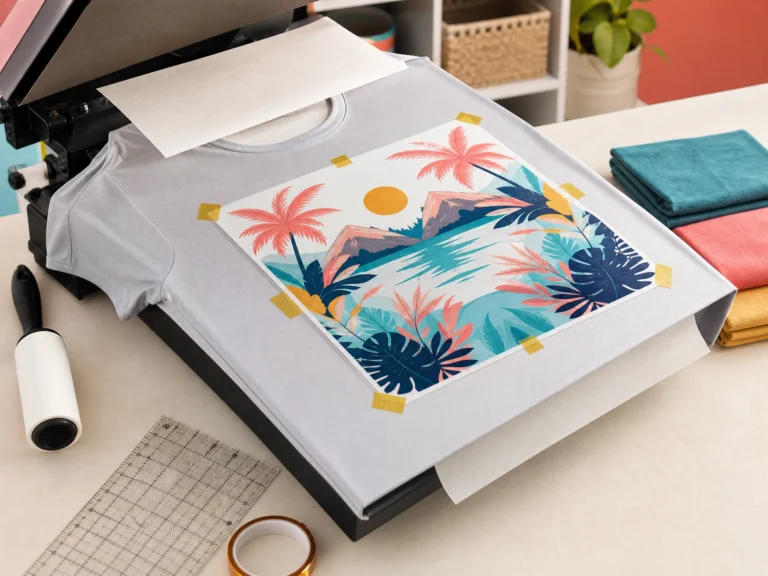
5. Position and secure the transfer
Place the printed side against the printable face of the faux leather. Align it carefully, then secure it with heat-resistant tape. Movement during pressing can create ghosting, which is a faint duplicate or blurred edge caused by the transfer shifting while the ink is still moving.
6. Add protective paper
Place clean butcher paper or another approved protective sheet between the transfer and the heat platen. Use a fresh sheet when ink has visibly transferred onto the paper. This simple step protects both the press and the next project.
7. Press using the blank’s recommended settings
For a PU faux-leather passport holder, one supplier lists 350–375°F, 40–60 seconds and medium pressure as a starting range. Other products may require different settings. Start at the lower end of the supplier’s range when appropriate, and avoid assuming that the 400°F settings used for many polyester garments automatically apply to faux leather.
Pressure should be even but not unnecessarily aggressive. Excess pressure can flatten texture, leave a glossy mark or distort a soft blank. If your press does not close evenly across the entire imprint area, correct that mechanical problem before judging the artwork.
8. Peel and shape according to instructions
Some faux-leather products require a warm peel; others provide different instructions. Follow the product documentation rather than using one universal peel rule. A passport holder, wrap or flexible patch may also need to be folded or shaped while warm, as the HPN passport-holder instructions specify.
Use heat-resistant gloves when handling a hot blank. Keep the finished item on a heat-safe surface and allow it to cool fully before evaluating final color and surface texture.
9. Inspect the result
Check four things: color density, sharpness, surface finish and physical shape. A design can be visually attractive while the blank is overheated or warped. Record the settings and outcome in a project log so you can repeat a successful result.
Starting settings: how to test instead of guessing
A temperature-and-time chart is useful only when it belongs to the exact blank. Even two faux-leather products with similar dimensions may use different coatings, backing materials and construction methods.
| Variable | What to observe during testing | Possible symptom when incorrect |
| Temperature | Whether color transfers without damaging the surface | Too much heat may cause bubbling, warping, discoloration or shine. |
| Time | Whether the design reaches the intended density | Too little time can produce a pale print; too much can damage the blank. |
| Pressure | Whether the entire design receives even contact | Too much pressure can flatten texture; too little can create uneven color. |
| Transfer movement | Whether edges remain crisp | Movement causes ghosting or double outlines. |
| Cooling and shaping | Whether the final form stays flat or curved as intended | Incorrect handling can create bends, ripples or unwanted memory in the material. |
For every new product, test at least one blank before ordering a full case. If you are selling the item, test a second blank to confirm repeatability. Save a photograph and a small settings record with the supplier name, batch, temperature, time, pressure and peel method.
How to make sublimation leather patches
Sublimation faux-leather patches are popular for hats, bags, jackets and small-business merchandise because they combine a premium visual texture with full-color artwork. The process is essentially the same as pressing a flat faux-leather sheet, but cutting and attachment introduce additional decisions.
You can cut the patch before pressing when the shape is already fixed, or press a larger sheet and cut afterward. Pressing first can make artwork placement easier because you have more room for alignment. Cutting first can reduce waste when you are working with a precise template. Use a test cut whenever you change blade, material thickness or cutting machine settings.
After pressing, attach the patch using stitching, compatible adhesive, rivets or another method appropriate for the intended product. If the patch will be sewn onto a hat or bag, leave enough edge space for the stitch line. Avoid placing vital text so close to the trim that minor cutting variation could damage readability.
How to sublimate a faux-leather tumbler wrap
A faux-leather tumbler wrap requires careful attention to curvature, alignment and even contact. Begin with a wrap sized for the specific tumbler rather than cutting a random sheet and hoping the edges meet cleanly.
Use a tumbler or mug press only when the wrap and press instructions support that workflow. Secure the transfer so it cannot slide around the curve, protect the press with clean paper and verify that the edges receive comparable pressure. For broader tumbler fundamentals, see Sublimation Co’s 20oz tumbler sublimation guide.
Do not judge a curved wrap by comparing it with a flat patch. A small gap, seam or edge variation may be part of the design, so plan the artwork around the seam before printing. Keep faces, lettering and other high-detail elements away from the closure area.
Common mistakes and how to fix them
Mistake 1: Pressing untreated natural leather
A high temperature cannot create a polymer coating where none exists. If the blank is not designed for standard sublimation, switch to a decoration method made for that material or choose a sublimation-ready faux-leather blank.
Mistake 2: Trusting the word “leather” in a product title
“Leather” may refer to genuine leather, PU, PVC, coated leatherette or a marketing description. Look for substrate specifications, application settings and a supplier guarantee of sublimation compatibility.
Mistake 3: Using too much heat or time
Glossy patches, bubbling, curling, discoloration and a melted-looking surface are warning signs. Stop the batch and test a new blank at the manufacturer’s lower recommended setting. Never keep increasing heat to compensate for a blank that is not sublimation-ready.
Mistake 4: Applying excessive pressure
Medium pressure is a common starting point for products such as the HPN PU passport holder, but the correct pressure is product-specific. If texture disappears or the surface becomes shiny, check pressure and platen contact before changing the artwork.
Mistake 5: Skipping the mirror step
Use a preflight checklist that includes “mirror artwork,” especially when creating personalized names, dates or directional graphics.
Mistake 6: Allowing the transfer to move
Tape the transfer securely, close the press in one controlled motion and avoid sliding the paper while the item is hot. Ghosting is usually a workflow problem rather than a design problem.
Mistake 7: Judging color while the item is still hot
Allow the product to cool before deciding whether the print is too dark, too pale or correctly saturated. Record the final result only after the surface has stabilized.
Mistake 8: Ignoring safety and material uncertainty
Heat-press only materials with known application instructions. Unknown PVC or vinyl-like products can behave poorly under heat and may create unwanted odors or fumes. Follow the press, blank and ink manufacturers’ safety guidance, work in a suitable ventilated area and keep hands away from the heated platen.
Is sublimation on faux leather worth it for a small business?
For a small craft business, faux-leather sublimation can expand a product line beyond shirts and mugs. Patches, key fobs, passport covers, journals and tumbler wraps can be sold as standalone items or bundled into gift sets. The perceived value comes from the combination of personalization, tactile texture and full-color artwork.
The opportunity is strongest when you treat production as a repeatable system rather than a one-off experiment. Calculate blank cost, transfer cost, packaging, labor, test waste, platform fees and shipping before setting a price. Do not use a two- or three-times markup as a universal rule; the right price depends on your niche, design licensing, competition, production time and customer demand.
A practical launch plan is to select one patch shape, one wrap style and one accessory. Test each product, photograph the results, document the process and create a small collection around a clear audience. You can then explore Sublimation Co’s free designs for suitable starting artwork and browse the Sublimation Co shop for additional design resources.
If you are building a broader product catalog, browse the Sublimation Tutorials and Sublimation Printing categories for related project ideas. When working with cotton products, remember that standard sublimation has different substrate requirements; Sublimation Co’s guide to sublimation on cotton explains the available workaround approaches.
Frequently asked questions
Can you sublimate directly onto real leather?
Not with standard sublimation on untreated natural leather. The printable surface must contain polyester or a compatible polymer coating. A specialty coated-leather product may work if its manufacturer explicitly supports sublimation, so test the exact blank first.
Can you sublimate on PU leather?
Yes, when the PU leather product is specifically manufactured and labeled for sublimation. PU leather is not automatically compatible merely because it is synthetic. Follow the supplier’s settings and test before production.
What temperature do you use for faux-leather sublimation?
There is no universal setting. One HPN SubliCraft PU passport holder lists 350–375°F for 40–60 seconds with medium pressure, but the supplier notes that settings vary. Use the instructions for your exact blank as the primary authority.
Do you mirror sublimation designs for leather patches?
Yes. Mirror the design before printing so text and directional graphics appear correctly after transfer.
Why is my faux-leather sublimation print faded?
Possible causes include an incompatible blank, insufficient heat or time, incorrect paper side, poor contact, incorrect printer settings or a design that was not prepared for the chosen color-management workflow. Start by confirming substrate compatibility and checking the blank instructions.
Why did my faux leather become shiny?
The material may have received too much heat, time or pressure, or it may not be suitable for the process. Stop using that setting and run a controlled test with a new blank at the manufacturer’s recommended lower range.
Can you sublimate on black faux leather?
Traditional sublimation is transparent and does not print white ink. A dark surface can therefore hide or significantly alter the colors. For predictable results, use a white or light-colored sublimation-ready face unless the blank and workflow specifically address dark substrates.
Is sublimation on leather permanent?
On a compatible sublimation-ready surface, the dye is designed to bond into the polyester or polymer layer rather than form a peelable film. Durability still depends on the blank, coating, press process, use conditions and care instructions.
Final verdict
Sublimation on leather is possible when “leather” means a compatible faux-leather, PU or coated blank—not untreated natural leather. Choose a substrate made for sublimation, follow its own application instructions, mirror the artwork, secure the transfer, use controlled heat and pressure, and test before producing a batch.
The most reliable beginner path is a flat sublimation-ready faux-leather patch or sheet. Once you can reproduce a crisp, even result, move on to key fobs, passport covers and tumbler wraps. With careful testing and accurate product descriptions, leather-look sublimation can become a practical addition to a small custom-products business.
References
[1] Sawgrass, The Complete Glossary for Print Shops and Sublimation
[2] Sawgrass Care, Ink Sets – Which One to Choose
[3] HeatPressNation, HPN SubliCraft Sublimation Faux Leather/PU Passport Holder

One Comment